This post may contain affiliate links. If you make a purchase through these links, we may earn a commission at no additional cost to you.
Remember that stack of CDs or DVDs you have? Maybe it’s old software installers, cherished family photos or videos, music albums you love, or backups of important documents. For years, optical discs like CDs and DVDs were the standard way we stored and shared digital information. They were convenient and held a decent amount of data for their time. But technology keeps changing, and many modern computers, especially laptops, just don’t come with built-in disc drives anymore. This creates a real problem: how do you get at the information stored on those old discs now?
It feels like your digital past is locked away, right? You have the physical discs, but no easy way to read them. This is where the simple yet powerful solution of a USB connection comes in. By using a USB disc drive or a USB adapter for an old internal drive, you can bridge the gap between your older media and your newer computer. This guide will walk you through why accessing old discs is a challenge today and how USB solutions offer a practical way to unlock your data and memories.
The Problem: Why Accessing Old Discs is Tricky Today
Accessing data from CDs and DVDs might seem straightforward – just put the disc in the drive, right? But in today’s tech landscape, it’s not always that simple. Several factors have made interacting with optical media less common and sometimes difficult. Understanding these challenges helps you appreciate why external USB solutions are so valuable.
The Decline of Internal Optical Drives
One of the biggest reasons you might be struggling to read old discs is the simple fact that most new computers don’t have built-in disc drives. Think about modern laptops – they’re designed to be thin, light, and portable. Adding an optical drive takes up space and adds weight, so manufacturers started leaving them out to make devices sleeker. Even many desktop computers now skip the internal disc drive in favor of more space for other components or a smaller case size.
This shift happened relatively quickly. Just a decade or so ago, a CD or DVD drive was standard equipment. Now, they’re considered optional peripherals, like external hard drives or specialized card readers. If your computer was bought in the last few years, chances are it lacks the necessary slot to even insert a CD or DVD. This immediately creates a barrier between you and your disc-based data.
The Aging Media: CD/DVD Longevity and Degradation
Beyond the hardware issue, the discs themselves aren’t immune to the passage of time. While CDs and DVDs were once thought to last for decades, their lifespan isn’t infinite, especially for recordable media (CD-R, DVD-R, CD-RW, DVD-RW). The materials used in these discs can degrade over time, a phenomenon often referred to as “disc rot.”
A standard CD or DVD is made of several layers. There’s a polycarbonate plastic base, a reflective layer (usually aluminum, gold, or silver), a dye layer where data is burned (on recordable discs), and a protective lacquer coating. Disc rot occurs when the reflective layer oxidizes or the organic dye layer breaks down. This can be caused by exposure to light, heat, humidity, scratches, or even just chemical reactions within the disc materials over many years.
When the reflective layer corrodes or the dye degrades, the laser in the disc drive can’t properly read the data pits and lands that represent your information. This leads to read errors, corrupted files, or the disc becoming completely unreadable. While some discs might last 20-30 years or more under ideal storage conditions (cool, dark, dry place, stored vertically), others can fail much sooner. This makes accessing old discs not just a matter of convenience, but sometimes a race against time before the data is lost forever.
Compatibility Issues: Old Discs, New Systems
Even if you have a drive and the disc is in good physical condition, you might run into compatibility problems. This isn’t usually about the disc format itself (CD-ROM, DVD-ROM are standard), but rather the file systems or software required to read the data.
For example, some older software discs might use file systems or copy protection methods that modern operating systems like Windows 10/11 or the latest macOS versions don’t fully support out-of-the-box. You might insert a disc and have the computer recognize it as a drive, but struggle to open or install the contents.
Similarly, driver issues can arise, though this is less common with standard data discs and more likely with very old operating system discs or specialized media. The drivers needed to interact with a specific type of disc or the software on it might not be available or compatible with your current operating system version. While most data CDs and DVDs use universal file systems like ISO 9660 or UDF that are widely supported, proprietary formats or very old structures can sometimes pose a challenge.
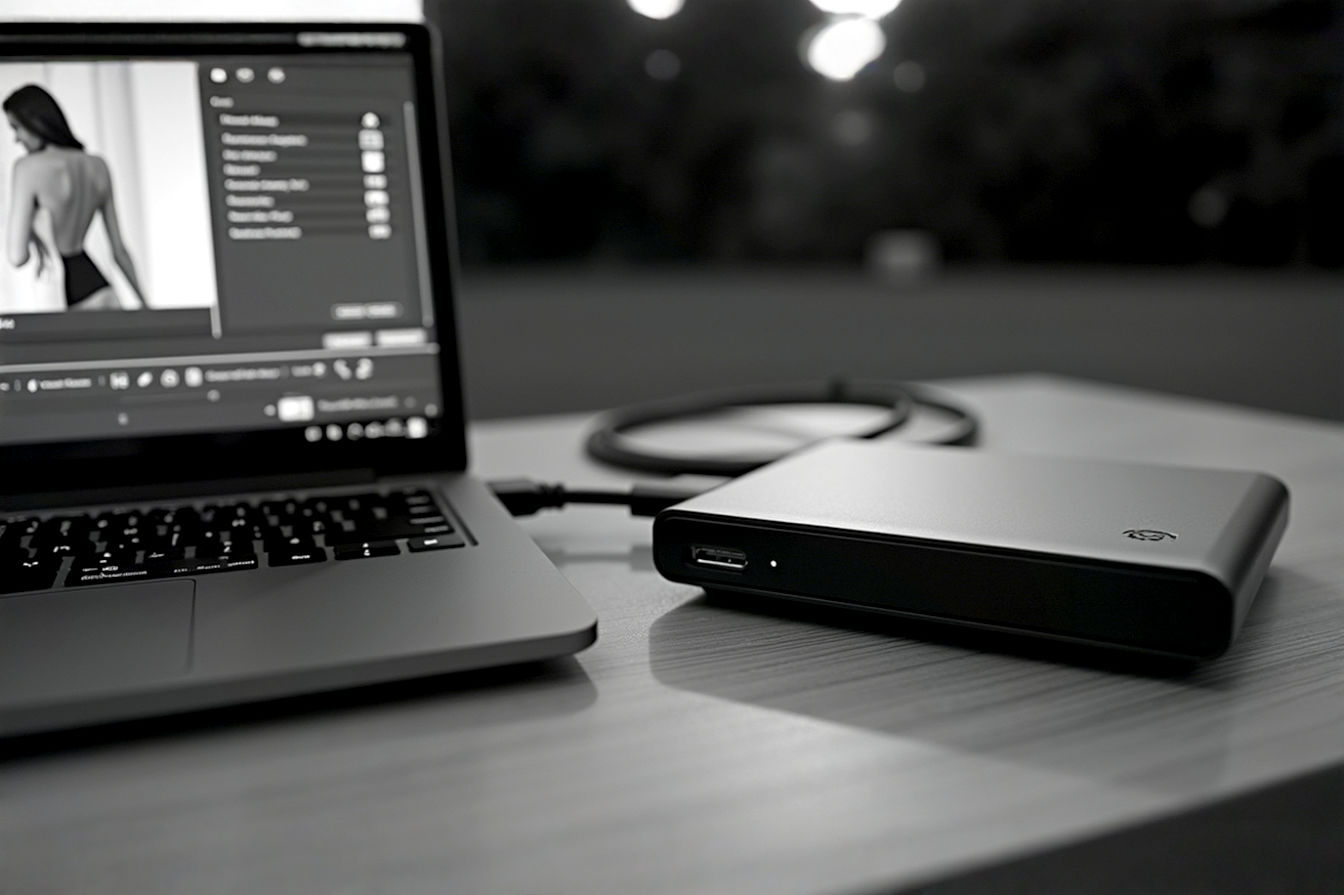
The Primary Solution: External USB Disc Drives
Given the challenges of missing internal drives and aging media, the most straightforward solution for many people is to use an external disc drive that connects to your computer via USB. These devices are essentially the same optical drives you’d find inside older computers, but they’re housed in their own case and powered externally, communicating with your computer through a standard USB cable.
What They Are and How They Work
An external USB disc drive contains an optical drive mechanism, just like an internal one. It has a tray that opens to accept a CD or DVD (or Blu-ray, depending on the drive type). Inside, a laser reads the data stored on the disc’s surface. The key difference is the interface. Instead of connecting to the computer’s motherboard via SATA or IDE cables, it connects using a USB cable.
This USB connection handles both the data transfer and, in many cases, the power supply for the drive. When you plug the drive into a USB port on your computer, the operating system usually recognizes it automatically as a storage device. You can then access the disc’s contents through File Explorer (Windows) or Finder (macOS) just like you would with a USB flash drive or external hard drive. The drive translates the data read from the disc into a format your computer understands and sends it over the USB connection.
Types of External Drives
External USB disc drives come in various types, supporting different optical media formats:
- CD-ROM Drives: These can only read CDs (CD-ROM, CD-R, CD-RW). They are less common now as most drives also support DVDs.
- DVD-ROM Drives: These can read both CDs and DVDs (DVD-ROM, DVD-R, DVD-RW, DVD+R, DVD+RW). This is a very common type.
- CD-RW/DVD-RW Drives (Burners): These are the most popular type of external drive today. They can read and write (burn) data onto both CDs and DVDs. This is useful if you want to create new discs or copy data from old discs onto new ones. They support formats like CD-R, CD-RW, DVD-R, DVD-RW, DVD+R, DVD+RW, and often DVD-RAM.
- Blu-ray Drives: These are the most advanced type. They can read and write Blu-ray discs, which have a much higher storage capacity than DVDs (typically 25GB for a single layer, 50GB for dual layer). They are also backward compatible, meaning they can usually read and write CDs and DVDs as well.
- M-DISC Compatible Drives: Some drives specifically advertise M-DISC compatibility. M-DISC (Millennial Disc) is a newer type of optical media designed for long-term archival storage. Instead of organic dye, it uses a synthetic, rock-like material that is much more resistant to degradation. An M-DISC compatible drive has a stronger laser capable of etching data into this durable layer, and can also read M-DISCs. If you’re thinking about long-term backups after accessing old data, an M-DISC drive could be a good investment.
Advantages of External USB Drives
Choosing an external USB drive offers several key benefits:
- Portability: They are typically compact and lightweight, making them easy to carry and use with different computers. You can plug them into a laptop at home, a desktop at work, or a friend’s computer if needed.
- Plug-and-Play: Most modern external drives are designed to be plug-and-play. You simply connect the USB cable, and your operating system automatically detects and installs the necessary drivers. There’s usually no complex setup required.
- Wide Compatibility: External USB drives work with almost any computer that has a compatible USB port (USB 2.0, 3.0, or newer). They are compatible with Windows, macOS, and many Linux distributions. This makes them a versatile solution regardless of your computer’s make or model.
- Ease of Use: Using an external drive is very similar to using an internal one. You just insert the disc, and the computer handles the rest, allowing you to access files, install software, or play media.
Disadvantages of External USB Drives
While convenient, external USB drives do have a few potential drawbacks:
- Speed Limitations: The speed of data transfer is limited by the USB connection and the drive’s own read/write speed. While modern USB standards (like USB 3.0 or 3.1) offer fast theoretical speeds, the actual performance is often slower than a direct SATA connection used by internal drives. For reading standard data or playing movies, this isn’t usually an issue, but ripping large music collections or copying massive data backups might take longer.
- Potential Power Issues: Some older or higher-speed external drives might require two USB ports or an external power adapter to get enough power. Most modern drives are designed to run off a single USB 3.0 (or newer) port, but it’s something to check, especially with older computers or USB hubs that might not provide sufficient power.
- Cost: Buying a new external drive is an additional expense. While basic DVD-RW drives are relatively inexpensive (often under $30-$40 USD), Blu-ray drives cost significantly more.
Choosing the Right External Drive
When selecting an external USB disc drive, consider these factors:
- Media Types You Need to Read/Write: Do you just need to read CDs and DVDs, or do you have Blu-rays as well? If you plan to burn discs, make sure the drive supports writing to the formats you need (CD-R, DVD-R, BD-R, etc.).
- Speed: Drives are rated with speeds (e.g., 24x CD, 8x DVD, 6x BD). Higher numbers mean faster read/write times. Consider your typical use case – occasional access doesn’t need the fastest drive, but frequent ripping or burning might benefit from higher speeds.
- USB Interface: Look for drives with USB 3.0 or newer for faster data transfer, though USB 2.0 is sufficient for basic reading and playback.
- Portability vs. Features: Slim, lightweight drives are great for travel but might sacrifice some speed or advanced features. Larger drives might offer better performance or more features like M-DISC support.
- Brand Reputation: Stick to reputable brands known for reliable optical drives to ensure longevity and good performance.
The DIY Solution: Using USB Adapters for Internal Drives
What if you have an old computer lying around with a perfectly good internal CD or DVD drive? Or maybe you upgraded your desktop PC and have the old drive sitting in a box? You don’t necessarily need to buy a whole new external drive. A more budget-friendly and often equally effective solution is to use a USB adapter designed to connect internal optical drives externally.
What are USB Adapters?
USB adapters for optical drives are small devices or cables that bridge the connection gap between the drive’s internal interface (like IDE or SATA) and a USB port on your computer. They essentially convert the drive’s native signal into a USB signal that your modern computer can understand.
These adapters come in different forms. Some are simple cable adapters, while others are small circuit boards with connectors. They typically have one connector for the optical drive (either IDE or SATA) and another connector for a standard USB cable. Many also include a power connector, as internal drives require more power than can typically be supplied by a single USB port alone.
How They Work: Bridging the Interface
Internal optical drives, like internal hard drives or SSDs, use specific interfaces to communicate with the computer’s motherboard. Older drives primarily used the IDE (Integrated Drive Electronics) interface, also known as PATA (Parallel ATA). This interface uses a wide ribbon cable with many pins. Newer drives, like most modern hard drives and SSDs, use the SATA (Serial ATA) interface, which uses a much smaller, flatter cable.
A USB adapter contains a small chip or chipset that acts as a translator. When you connect an IDE or SATA drive to the adapter and the adapter to your computer via USB, this chip intercepts the commands coming from the computer (sent over USB) and translates them into the language the IDE or SATA drive understands. Conversely, it takes the data read from the drive (in IDE or SATA format) and converts it back into a USB data stream for the computer.
For IDE drives, the adapter needs to handle the parallel data transfer of the IDE interface and convert it to the serial data transfer of USB. For SATA drives, the conversion is simpler as both are serial interfaces, but the adapter still manages the communication protocols and power delivery. The adapter essentially makes the internal drive behave like a standard USB mass storage device in the eyes of your operating system.
Types of Adapters
Just like drives, adapters come in types based on the drive interface they support:
- IDE to USB Adapters: These are specifically for older optical drives that use the IDE (PATA) interface. They will have a connector that matches the wide pin header on an IDE drive.
- SATA to USB Adapters: These are for newer optical drives that use the SATA interface. They will have a connector that matches the smaller SATA data and power ports.
- Combo Adapters: Many adapters are designed to work with both IDE and SATA drives (and often hard drives as well). These are the most versatile as they can handle a wider range of older internal drives. They will typically have both IDE and SATA connectors.
Most adapters, especially those for 3.5-inch desktop drives or any optical drive, will require an external power source. This is because internal drives draw more power than a standard USB port can provide. The adapter kit usually includes a power adapter or cable that connects to the adapter or directly to the drive.
Advantages of Using USB Adapters
Using a USB adapter with an old internal drive has its own set of benefits:
- Cost-Effective: If you already have an old internal drive, buying an adapter is usually much cheaper than purchasing a brand-new external drive. This is a great way to save money and repurpose old hardware.
- Potentially Higher Speed: An internal drive might have a higher maximum read speed than some budget external drives, limited only by the USB connection’s bandwidth. While the USB connection is the bottleneck, you’re utilizing the full capability of the drive itself.
- Repurposing Old Hardware: It’s satisfying to give new life to components from old computers that might otherwise end up in storage or recycling.
Disadvantages of Using USB Adapters
However, there are some downsides to the adapter route:
- Requires Some Technical Comfort: Connecting an internal drive to an adapter is a bit more hands-on than just plugging in an external drive. You need to identify the drive’s interface (IDE or SATA) and connect the cables correctly. It’s not difficult, but it requires opening up an old computer or knowing how to handle bare drives.
- External Power Needed: As mentioned, most setups require an external power supply for the drive, which means more cables and a power outlet needed.
- Less Portable: An internal drive connected via an adapter isn’t as neat or portable as a dedicated external drive in its own enclosure. It’s more of a temporary setup for accessing data at a desk.
- Potential Compatibility Quirks: While generally reliable, some older drives or specific adapter chipsets might occasionally have minor compatibility issues with certain operating systems or USB controllers. This is less common with standard drives but can happen.
Choosing the Right Adapter
To pick the correct USB adapter, you need to know a few things about your old internal drive:
- Identify the Interface: Look at the back of your internal optical drive. Does it have a wide connector with many pins (IDE/PATA) or a smaller connector with two side-by-side ports (SATA)? This is the most crucial step.
- Check Power Needs: Standard desktop optical drives (5.25-inch size) require a Molex power connector (a larger 4-pin connector) for IDE drives or a SATA power connector for SATA drives. Laptop optical drives (slimline size) use a smaller, combined data and power connector. Ensure the adapter provides the correct power connection or includes the necessary power cables/adapters.
- Adapter Features: Some adapters are just for data, while others include power. Combo adapters offer versatility if you have both IDE and SATA drives (or hard drives) to access.
- Read Reviews: Check reviews for the adapter model you’re considering to see if other users report compatibility issues or reliable performance.
Step-by-Step Guide: Accessing Your Old Discs
Once you have your external USB drive or your internal drive connected via a USB adapter, accessing the data on your old CDs and DVDs is usually a straightforward process. Here’s a general guide for both scenarios.
Using an External USB Drive
This is the simpler method:
- Connect the Drive: Plug the USB cable from the external drive into an available USB port on your computer. If the drive requires external power, connect the power adapter to the drive and a power outlet.
- Wait for Recognition: Your operating system (Windows, macOS, etc.) should detect the new hardware. You might see a notification saying “Installing device driver software” or something similar. This usually only takes a moment.
- Insert the Disc: Press the eject button on the external drive to open the disc tray. Place your CD or DVD onto the spindle in the tray, label side up, and gently push the tray back in.
- Access the Disc: Your computer should recognize that a disc has been inserted. Depending on your operating system settings, a pop-up might appear asking what you want to do (e.g., “Open folder to view files,” “Play DVD movie”). If no pop-up appears, open File Explorer (Windows) or Finder (macOS). The external drive should appear under “This PC” or “Devices and Drives” with a drive letter (like D: or E:). Double-click on the drive icon to view the contents of the disc.
- Copy or Use Files: You can now access the files on the disc. You can copy and paste files to your computer’s hard drive, run software installers directly from the disc, or play media files using appropriate software.
Using a USB Adapter with an Internal Drive
This method requires a few more steps to set up:
- Identify Drive Interface: Before you start, look at the back of your internal optical drive to determine if it’s IDE or SATA. This is critical for picking the right adapter.
- Connect Drive to Adapter: Connect the appropriate cable from the USB adapter to the data port on your internal optical drive. For IDE drives, ensure the cable is oriented correctly (look for a pin 1 indicator). For SATA drives, the connectors are keyed and will only fit one way.
- Connect Power: Connect the power cable from the adapter’s power supply (or the included power adapter) to the power port on your internal drive. For IDE drives, this is a larger Molex connector. For SATA drives, it’s the smaller power connector next to the data port.
- Connect Adapter to Computer: Plug the USB cable from the adapter into an available USB port on your computer.
- Connect Adapter Power (if separate): If your adapter uses a separate power supply (not just drawing power from USB), plug the adapter’s power supply into a wall outlet.
- Power On Drive/Adapter: Some adapters have a power switch. Turn it on. The internal drive should power up (you might hear it spin briefly).
- Wait for Recognition: Your operating system should detect the connected drive via the adapter.
- Insert the Disc: Insert your CD or DVD into the internal drive’s tray.
- Access the Disc: Access the disc through File Explorer or Finder, just like with an external drive. The drive should appear as a removable storage device.
Troubleshooting Common Issues
Sometimes things don’t work perfectly the first time. Here are some common issues and what to try:
- Drive Not Recognized:
- Check Connections: Ensure all cables (USB, data, power) are securely plugged in at both ends.
- Try a Different USB Port: Sometimes specific USB ports can be problematic. Try a different one on your computer.
- Check Device Manager (Windows): Open Device Manager (search for it in the Start menu). Look under “DVD/CD-ROM drives” or “Disk drives.” If you see an entry with a yellow exclamation mark, there’s a driver issue. Right-click and select “Update driver” or “Uninstall device” and then restart your computer.
- Check System Information (macOS): Go to Apple menu > About This Mac > System Report. Look under “USB.” See if the external drive or adapter is listed.
- Restart Computer: A simple restart can often resolve temporary recognition issues.
- External Power: If using an adapter or a drive that needs external power, double-check that the power supply is connected and turned on.
- Disc Not Reading:
- Clean the Disc: Gently clean the underside of the disc with a soft, lint-free cloth, wiping from the center outwards. Dust, fingerprints, or smudges are common culprits.
- Check for Damage: Inspect the disc for visible scratches, cracks, or signs of disc rot (discoloration, cloudiness, pinholes when held up to the light). Severely damaged discs may be unreadable.
- Try Another Disc: Test with a known good disc to see if the issue is with the drive or the specific disc you’re trying to read.
- Try Another Drive/Adapter: If possible, try the disc in a different drive or use a different adapter to rule out a faulty device.
- Slow Speeds:
- USB Port Speed: Ensure you’re using a high-speed USB port (USB 3.0 or newer) if your drive/adapter supports it. Using a USB 2.0 port will limit speeds.
- Cable Quality: A faulty or low-quality USB cable can sometimes impact speed.
- Drive Condition: An old or failing drive might have slower performance.
- Power Problems:
- Insufficient Power: If using an adapter, ensure the external power supply is adequate for the drive. Some high-speed drives draw more power.
- USB Hubs: Connecting through an unpowered USB hub might not provide enough power. Connect directly to a USB port on your computer.
Beyond Basic Access: Data Preservation and Management
Simply accessing your old discs is a great first step, but what do you do with the data once you can read it? This is an opportunity to preserve your digital history and make it more accessible for the future.
Ripping/Copying Data
The most common action after accessing an old disc is to copy the data onto your computer’s hard drive or another modern storage medium. For data discs (like those with documents, photos, or software installers), you can usually just drag and drop files or folders from the disc drive icon to a folder on your computer.
For audio CDs or video DVDs, the process is called “ripping.” This involves using specialized software to extract the audio tracks or video content from the disc and convert them into digital file formats (like MP3, FLAC, MP4, MKV). There are many free and paid software applications available for ripping audio CDs and DVDs. Be aware that ripping copyrighted material for distribution is illegal, but making personal copies for backup purposes is generally accepted under fair use principles in many regions.
Similarly, you might want to create exact digital copies of your discs, especially for software or game installers. This is called creating an “image file” (like an ISO file). This single file contains all the data and structure of the original disc. You can then “mount” this image file on your computer (making it appear like a physical disc is in a drive) to install software or access contents without needing the physical disc anymore. Software for burning discs often includes features for creating image files.
Creating Digital Archives
Once you’ve copied or ripped the data from your discs, it’s smart to organize it into a digital archive on your computer or external storage. Create a clear folder structure based on the type of content (e.g., “Family Photos – CDs,” “Old Software,” “Music Albums”).
Consider using standard, widely compatible file formats when possible. For photos, stick to JPEG or PNG. For documents, PDF is a good choice for preservation. For audio, MP3 or FLAC are common. For video, MP4 is highly compatible. This ensures you’ll be able to access these files easily in the future, even as software changes.
Data Longevity: Understanding M-DISC and Best Practices
While you’re accessing old discs, it’s a good time to think about the long-term preservation of your data. As we discussed, standard recordable CDs and DVDs can degrade. If you have truly critical data you want to archive for decades, consider using M-DISC media.
M-DISCs are designed to be much more durable. Instead of relying on organic dyes that can fade or degrade, they physically etch the data into a stable, inorganic recording layer. Manufacturers claim M-DISCs can last for hundreds or even a thousand years under proper storage conditions. To write to an M-DISC, you need an M-DISC compatible burner (which can also burn standard CDs/DVDs/Blu-rays). Standard drives can read M-DISCs once they’ve been burned. While M-DISCs are more expensive than standard recordable media, they offer peace of mind for long-term archiving.
Regardless of the media type, proper storage is key to maximizing longevity. Keep discs in their cases (jewel cases or DVD cases) to protect them from scratches and dust. Store them vertically in a cool, dark, dry place with stable temperature and humidity. Avoid attics, basements, or garages where conditions can fluctuate wildly. Keep them away from direct sunlight and heat sources.
Recovering Data from Damaged Discs
What if you insert a disc, and your drive struggles to read it? Or some files are corrupted? Data recovery from damaged optical media is possible, but not always guaranteed.
Sometimes, a different optical drive might be able to read a disc that one drive struggles with. The laser calibration or error correction capabilities can vary between drives. So, trying the disc in another external or internal drive is a good first step.
There are also software tools designed specifically for recovering data from scratched or partially corrupted CDs and DVDs. These programs use advanced error correction techniques and attempt to read data from damaged sectors multiple times. They can sometimes piece together usable files even from discs that appear unreadable through normal means. Results vary depending on the severity and type of damage.
For severely damaged or critically important discs, professional data recovery services might be an option. These services have specialized equipment and cleanroom environments to attempt recovery from media that home users cannot. However, these services can be very expensive, and success is not guaranteed.
Future-Proofing Your Media Collection
Accessing your old discs using a USB drive or adapter is a crucial step in preserving your data. But relying solely on optical media, even M-DISC, isn’t the only or necessarily the best long-term strategy in the digital age.
Migrating Data to Modern Storage
Once you have successfully accessed and copied the data from your CDs and DVDs, the most effective way to future-proof it is to migrate it to modern, more reliable, and more convenient storage solutions:
- Solid State Drives (SSDs): Excellent for fast access to frequently used data. While not ideal for massive long-term archives due to cost per gigabyte and potential data retention issues over very long periods without power, they are great for active collections.
- Hard Disk Drives (HDDs): Offer the best cost per gigabyte for large amounts of data. Internal or external HDDs are suitable for storing large digital archives of photos, videos, music, and document backups. They are generally reliable, though mechanical parts can fail.
- Cloud Storage: Services like Google Drive, Dropbox, OneDrive, or specialized photo/video cloud storage offer convenient access from anywhere and protect against local hardware failure or disaster. However, this requires an ongoing subscription cost, and you are relying on a third party.
- Network Attached Storage (NAS): A personal cloud storage solution. A NAS is a device containing one or more hard drives connected to your home network. You can access your files from any device on your network, and many NAS systems offer features for remote access and automatic backups. This gives you control over your data while offering many benefits of cloud storage.
Regular Backups: The Importance of Redundancy
Regardless of where you store your migrated data, the single most important principle for data preservation is redundancy. Don’t keep your only copy of important data in just one place. Follow the 3-2-1 backup rule:
- Have 3 copies of your data.
- Store the copies on at least 2 different types of media (e.g., internal hard drive and external hard drive, or external hard drive and cloud storage).
- Keep 1 copy offsite (e.g., cloud storage, a backup drive stored at a friend’s house, or a safe deposit box).
By migrating your data from old optical discs to modern storage and implementing a regular backup strategy, you ensure that your valuable digital memories, important documents, and cherished media collection are safe and accessible for years to come, long after the original discs might have degraded.
Conclusion
The disappearance of built-in disc drives from most modern computers has presented a challenge for anyone with a collection of old CDs and DVDs. These discs hold a wealth of data, from essential software and backups to irreplaceable personal memories. Fortunately, this problem has a clear and accessible solution: using USB connectivity.
Whether you opt for the simplicity of a dedicated external USB disc drive or the cost-effectiveness of repurposing an old internal drive with a USB adapter, you can easily bridge the technological gap. These solutions allow your modern computer to communicate with the optical media of the past, unlocking access to your data.
Beyond simply reading the discs, this is an opportunity to take control of your digital legacy. By copying or ripping your data, organizing it into digital archives, and migrating it to more robust storage solutions like external hard drives, SSDs, or cloud storage, you can protect it from the degradation that affects older media. Implementing a solid backup strategy ensures redundancy, safeguarding your data against future hardware failures or accidents. Don’t let your valuable data and memories remain trapped on aging discs. Embrace the USB problem-solution and bring your digital past into the present and the future.