This post may contain affiliate links. If you make a purchase through these links, we may earn a commission at no additional cost to you.
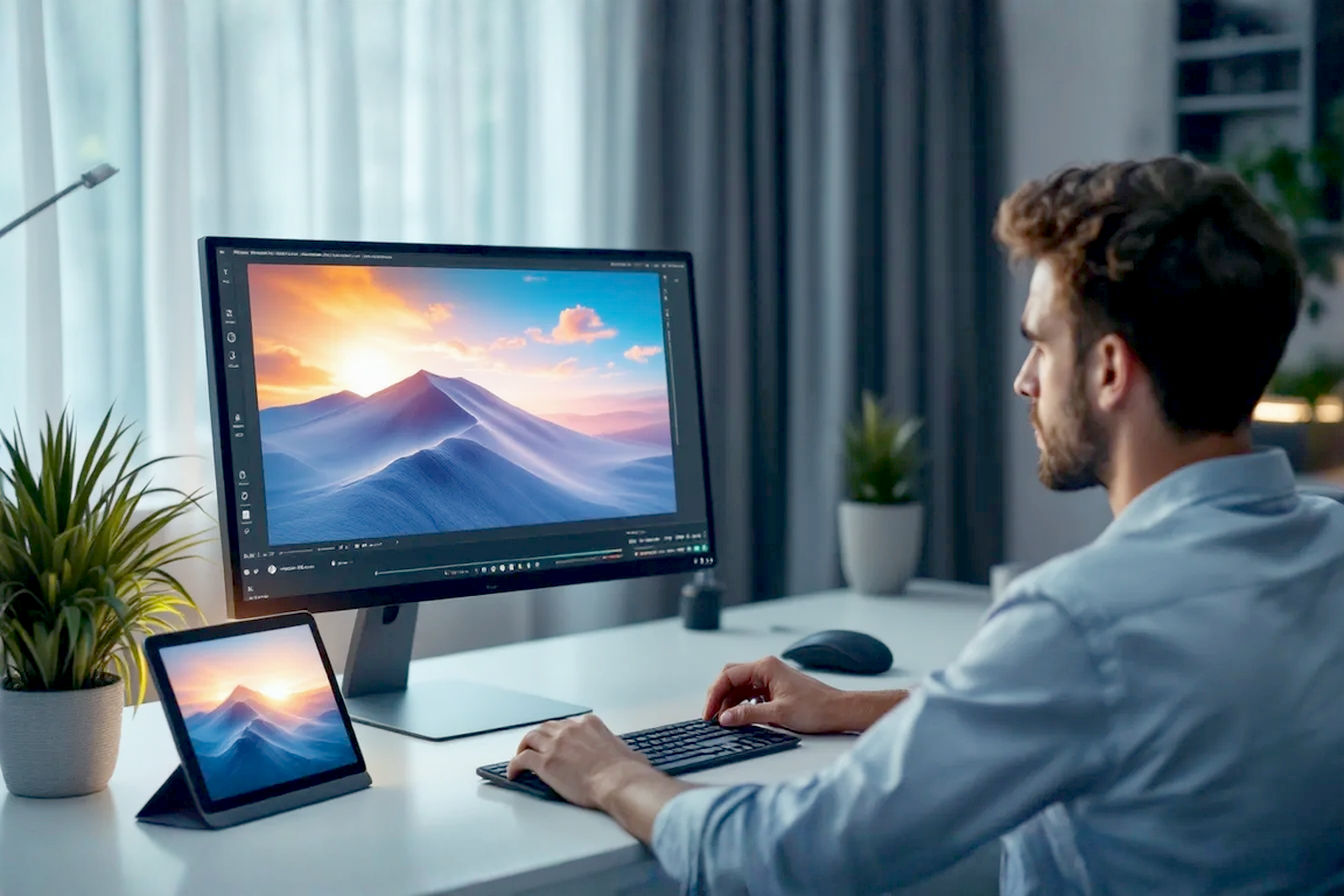
Captivating visuals are essential. Whether you’re building a brand, marketing a product, or simply trying to communicate effectively online, high-quality graphics can make all the difference. They grab attention, convey messages quickly, and leave a lasting impression. However, the challenge for many has always been the perceived barrier to creating these visuals: professional design software often comes with a hefty price tag and a steep learning curve. This can feel daunting, especially for individuals, startups, or small businesses on a tight budget.
But what if you could create stunning, professional-looking designs without spending a dime or dedicating months to learning complex software? The good news is, you absolutely can! The rise of free online graphic editors has democratized design, putting powerful tools into the hands of everyone, regardless of their budget or design experience. These browser-based platforms offer an incredible balance of robust features and user-friendly interfaces, allowing you to produce everything from social media posts and website banners to presentations and infographics with surprising ease and quality.
This article will be your definitive guide to navigating the exciting world of these free tools. We’ll dive deep into the top 5 free graphic editor online tools that stand out for their ability to help you create quick and professional designs. We’ll explore their key features, dissect their strengths and weaknesses (particularly their free plan limitations), and help you understand which tool is the perfect fit for your specific needs. Get ready to unleash your creativity and design like a pro—for free!
Why Choose a Free Online Graphic Editor?
Before we jump into our top picks, let’s explore why opting for a free online graphic editor is such a smart move for so many people. These tools aren’t just about saving money; they offer a host of advantages that make them incredibly practical and appealing in the modern digital landscape.
Accessibility and Convenience
One of the biggest draws of online design tools is their sheer accessibility. Forget about lengthy software installations or worrying about compatibility with your operating system. All you need is a web browser and an internet connection, and you’re ready to start creating. This means you can work on your designs from virtually any device—be it a desktop, laptop, or even a tablet in some cases.
Many of these platforms also offer cloud storage (though often limited on free plans). This is a huge plus because it means your designs are saved online, accessible from anywhere, and you don’t have to worry about losing your work if your computer crashes. Some even offer basic collaboration features, allowing you to share your designs with others for feedback or joint editing, making them great for team projects or client work, even on a budget graphic design approach. This “design anywhere, anytime” flexibility is invaluable in today’s mobile world.
Cost-Effectiveness
This one is pretty straightforward: “free” is a hard price to beat! For startups bootstrapping their way to success, small businesses managing tight marketing budgets, students needing visuals for projects, or non-profits aiming to make a big impact with limited resources, free design software is a game-changer. It eliminates the significant upfront investment typically associated with professional-grade design suites like Adobe Creative Cloud.
This cost-effectiveness allows you to allocate your precious financial resources to other critical areas of your venture or project. You can experiment with different design ideas and create a wealth of visual content without worrying about subscription fees piling up. It truly levels the playing field, enabling anyone to produce high-quality graphics.
User-Friendliness for Non-Designers
Many traditional design programs are incredibly powerful, but they also come with interfaces that can feel overwhelming for beginners. Free online graphic editors, on the other hand, are generally designed with user-friendliness at their core. They often feature intuitive, drag-and-drop interfaces that make it easy to add and arrange elements on your canvas.
A standout feature for non-designers is the extensive availability of pre-made templates. Whether you need a Facebook post, an Instagram story, a business card, or a presentation slide, there’s likely a template to get you started. This significantly reduces the intimidation factor and provides a fantastic launchpad for your creativity. You can customize these templates with your own text, images, and colors, achieving a professional look without needing a degree in design. The learning curve is typically much gentler, allowing you to get up and running, creating impactful visuals in no time.
Key Features to Look For in a Free Online Graphic Editor
While “free” is great, not all free tools are created equal. When evaluating options, consider these key features:
- Template Library: The variety and quality of available templates.
- Ease of Use: How intuitive the interface is and the steepness of the learning curve.
- Supported File Formats: What types of files you can import and, crucially, export (e.g., JPG, PNG, PDF).
- Basic Photo Editing: Capabilities like cropping, resizing, filters, and color adjustments.
- Text Tools: A good selection of fonts and text styling options.
- Stock Asset Library: Availability of free photos, icons, illustrations, and other elements.
- Limitations of Free Plans: Be aware of common restrictions like watermarks on exports, limited downloads, reduced storage, or fewer advanced features.
Understanding these aspects will help you choose a tool that truly meets your needs for creating quick professional designs online.
The Top 5 Free Graphic Editor Online Tools
Now, let’s get to the heart of the matter: our curated list of the top 5 free online graphic editors that can help you create impressive designs quickly and professionally. Each tool has its unique strengths and is suited to different types of users and projects.
1. Canva: The All-Rounder for Everyone
If there’s one name synonymous with accessible online design, it’s Canva. Launched in 2013, this Australian-born platform has revolutionized the way millions of people create visuals, from social media graphics to full-blown presentations. Its mission has always been to empower the world to design anything and publish anywhere, and its massive user base is a testament to its success.
Key Features of Canva’s Free Plan
Canva’s free plan is remarkably generous, offering a wealth of features that are more than enough for most everyday design tasks:
- Extensive Template Library: This is Canva’s crown jewel. You get access to hundreds of thousands of free templates across dozens of categories: social media posts (Instagram, Facebook, X, Pinterest, TikTok), presentations, posters, flyers, logos, resumes, invitations, video thumbnails, and much more. These templates are professionally designed and easily customizable.
- Drag-and-Drop Interface: Canva’s editor is incredibly intuitive. You simply drag elements from the sidebar (text, photos, graphics, videos, audio) onto your canvas and arrange them as needed.
- Photo Editing Tools: Basic photo editing is built-in. You can crop, resize, flip, adjust brightness, contrast, saturation, apply filters, and even add effects like shadows or outlines. While the AI-powered “Background Remover” is largely a Pro feature, there are often workarounds or simpler background removal options for basic needs.
- Vast Library of Free Assets: Canva offers millions of free photos, graphics (icons, shapes, illustrations), videos, and audio tracks. There’s also a wide selection of free fonts. Premium assets are clearly marked with a crown icon.
- Collaboration (Limited): You can share your designs with others for viewing or editing by sending a link. Real-time collaboration on the same design is possible.
- Supported File Formats: You can download your designs in various formats, including JPG, PNG (ideal for graphics with transparent backgrounds, though full transparency control might be better in Pro), PDF (standard and print), GIF, and even MP4 for simple video/animation designs. Some advanced export options like SVG or higher quality compression might be Pro-only.
- Generous Storage: The free plan offers 5GB of cloud storage for your designs and uploads.
User Interface and Ease of Use
Canva’s interface is clean, colorful, and exceptionally easy to navigate, even for absolute beginners. The main dashboard organizes your recent designs and provides quick access to template categories. The editor itself has a central canvas area, a left sidebar for accessing elements, templates, uploads, and text, and a top toolbar that changes contextually based on the selected element, offering customization options. It’s designed to be non-intimidating and encourages experimentation. Most users can start creating meaningful designs within minutes of signing up.
Strengths (Pros)
- Incredibly User-Friendly: Its intuitive interface makes it accessible to everyone, regardless of design skill.
- Massive Template and Asset Library: The sheer volume of free templates and design elements is a huge advantage, providing endless inspiration and starting points.
- Versatile: Suitable for a vast range of design needs, from social media to print materials and presentations.
- Quick Social Media Graphics: Perfect for quickly churning out engaging content for various platforms.
- Active Community and Tutorials: Lots of learning resources are available.
Limitations (Cons) of the Free Plan
While powerful, the free plan does have limitations designed to encourage upgrading to Canva Pro:
- Paywalled Advanced Features: Features like Brand Kit (for storing brand colors, logos, fonts), Magic Resize (instantly resizing a design for different platforms), premium templates and elements, advanced AI tools (like Magic Eraser, more robust Background Remover), and unlimited version history are reserved for Pro users.
- Limited Storage (Relatively): 5GB is decent, but heavy users might hit the limit.
- Output Quality for Print: While you can download print PDFs, professional printers might prefer files with more advanced color control (CMYK) or vector outputs (SVG for logos), which are better supported in Pro.
Who is Canva Best For?
Canva is ideal for almost anyone needing to create attractive visuals quickly and easily. This includes:
- Social media managers and marketers who need a constant stream of content.
- Bloggers and content creators for featured images, infographics, and promotional materials.
- Students for presentations, projects, and resumes.
- Small business owners for marketing materials, business cards, and simple logos.
- Educators for creating engaging learning materials.
- Anyone who wants to make personal projects like invitations or greeting cards look polished without a steep learning curve.
If you’re looking for an all-around, easy-to-use online design tool Canva is an excellent starting point.
2. Figma: The Collaborative Powerhouse (with a Generous Free Tier)
While Figma is widely recognized in professional circles as a leading collaborative interface design tool for UI/UX projects, its robust vector editing capabilities and generous free “Starter” plan make it a surprisingly powerful option for a wide range of general graphic design tasks as well. It’s a step up in complexity from Canva but offers significantly more precision and flexibility, especially for vector-based work.
Key Features of Figma’s Free Plan (Starter Plan)
Figma’s free offering is quite impressive, especially for individual users or small teams just starting:
- Powerful Vector Editing: Figma is a true vector editor. This means you can create scalable graphics like logos, icons, and illustrations that won’t lose quality when resized. Its pen tool and shape tools are sophisticated.
- Unlimited Personal Files: You can create and store an unlimited number of design files in your personal drafts.
- Limited Team Projects: The free plan allows for 3 Figma and 3 FigJam files within a team, with unlimited collaborators on those files. This is great for small collaborative projects.
- Version History (30 days): Figma automatically saves versions of your work, and the free plan gives you access to the last 30 days of history, which is a lifesaver.
- Community Files and Plugins: Figma has a vibrant community where users share design files, templates, and plugins. The free plan gives you full access to browse and duplicate these resources, which can significantly speed up your workflow and provide learning opportunities. Plugins can add all sorts of functionality, from icon libraries to accessibility checkers.
- Basic Prototyping Tools: You can create interactive prototypes by linking frames together, simulating user flows for apps or websites.
- FigJam Access: The free plan includes access to FigJam, Figma’s online whiteboarding tool, which is excellent for brainstorming, diagramming, and collaborative sessions. You get 3 FigJam files in a team.
User Interface and Ease of Use
Figma’s interface is more akin to professional design software like Adobe XD or Sketch. It’s clean and well-organized but definitely has a steeper learning curve than Canva. The main workspace consists of a canvas, a layers panel on the left, a properties panel on the right (which changes based on the selected object), and tools at the top. Understanding concepts like frames, components, constraints, and vector networks is key to leveraging Figma’s power. While it might seem daunting for absolute beginners looking for quick, template-based designs, those willing to invest a little time in learning will find it incredibly rewarding, especially for creating custom graphics from scratch.
Strengths (Pros)
- Excellent for UI/UX Design: Its core strength, perfect for wireframes, mockups, and interactive prototypes.
- Superior Vector Graphics Capabilities: Ideal for logos, icons, illustrations, and any design that needs to be perfectly scalable.
- Real-Time Collaboration is Top-Notch: Multiple users can work on the same file simultaneously, with changes visible instantly. This is a core feature, not an afterthought.
- Extensive Plugin Ecosystem: Plugins can automate tasks, add new features, and integrate with other services.
- Cross-Platform: Works seamlessly in a browser on Windows, macOS, and Linux, with optional desktop apps for a more native feel.
- Generous Free Tier for Individuals: Unlimited personal files and access to core features is a huge plus.
- Component-Based Design: Encourages creating reusable design elements, which is great for consistency and efficiency.
Limitations (Cons) of the Free Plan
- Overkill for Simple, Quick Graphics: If you just need a fast social media post from a template, Canva is quicker.
- Steeper Learning Curve: Requires more time and effort to master than template-driven editors.
- Limited Team Project Features: The 3-file limit per team in Figma/FigJam can be restrictive for larger ongoing team projects. More advanced team features (like shared libraries beyond a single file, unlimited projects) are part of paid plans.
- Fewer “Ready-Made” Assets: While the community provides many resources, Figma doesn’t have the same massive built-in library of drag-and-drop photos and diverse illustrative elements as Canva. Its focus is more on creating assets from scratch or using specialized plugins.
Who is Figma Best For?
Figma’s free plan is an outstanding choice for:
- Aspiring and professional UI/UX designers who need a powerful tool for web and app design.
- Web designers creating mockups and prototypes.
- Graphic designers who need robust vector editor online free capabilities for creating logos, icons, and custom illustrations.
- Individuals or small teams working on collaborative design projects where real-time co-editing is essential.
- Anyone who wants to learn a professional-grade design tool without the upfront cost.
- Those who value precision and the ability to create complex, scalable designs.
If your design needs lean towards custom vector work, interface design, or highly collaborative projects, investing time to learn Figma free will pay off significantly.
3. Visme: For Data Visualization and Presentations
Visme carves out a niche for itself by focusing on helping users create visually engaging presentations, infographics, reports, and other forms of data visualization. While it can handle general graphic design tasks, its true strength lies in transforming data and information into compelling visual stories. It aims to be an all-in-one content creation tool for businesses and educators.
Key Features of Visme’s Free Plan
Visme’s “Basic” free plan offers a good starting point, though with some notable limitations:
- Templates for Specific Needs: You get access to a selection of templates specifically designed for presentations, infographics, charts, social media graphics, and documents. The variety is decent but significantly less than Canva’s free offering.
- Data Visualization Tools: This is where Visme shines. The free plan includes tools to create various types of charts (bar, line, pie, etc.), graphs, and even basic maps to represent data.
- Limited Asset Library: Access to a library of icons, photos, and design elements, but many of the premium assets are locked.
- Animation and Interactivity (Limited): Some basic animation features and the ability to add simple interactive elements like links or pop-ups are available, which can make presentations more engaging.
- Storage Limitations: The free plan comes with only 100MB of storage, which can fill up quickly.
- Branded Exports (Visme Logo): This is a significant drawback for professional use – designs created on the free plan will often include a Visme logo or branding.
- Limited Download Formats: You can typically download your designs as JPG. Other formats like PNG, PDF, HTML5, or video might be restricted or premium.
- Limited Number of Projects: You can only have a few active projects (e.g., up to 5) at a time on the free plan.
User Interface and Ease of Use
Visme’s interface strikes a balance between offering a good range of features and maintaining usability. It’s more structured than Canva, reflecting its focus on information design and presentations. The editor features a familiar layout with a canvas, a left sidebar for adding elements (basics, graphics, photos, data, media), and a right-hand panel for customization. For users familiar with presentation software like PowerPoint or Google Slides, Visme will feel somewhat intuitive, especially when working on slide-based projects. The data visualization tools are relatively easy to use: you can input data directly or import it from spreadsheets to generate charts.
Strengths (Pros)
- Excellent for Infographics and Data-Rich Presentations: Its dedicated tools and templates make creating these types of visuals much easier than with general-purpose editors.
- Good Range of Data Visualization Tools: The ability to create various charts and graphs directly within the platform is a major plus.
- Interactive Elements: Even basic interactivity can make content more engaging, and Visme offers this on its free plan.
- Focus on Professional Content: Geared towards creating polished reports, presentations, and branded documents.
Limitations (Cons) of the Free Plan
- Visme Branding on Outputs: The presence of the Visme logo on free exports is a major downside for many users needing unbranded, professional work.
- Strict Limitations on Storage, Projects, and Assets: 100MB storage, a small number of projects, and a more limited free asset library compared to competitors.
- Premium Features Lockout: Many of the more advanced data visualization options, animation capabilities, collaboration tools, and export formats are reserved for paid plans.
- Download Format Restrictions: Primarily JPG downloads can be limiting if you need transparent backgrounds (PNG) or high-quality PDFs for print.
Who is Visme Best For?
Visme’s free plan is best suited for:
- Marketers and businesses needing to create basic infographics or data-driven presentations for internal use or where Visme branding isn’t a major concern.
- Educators and students who want to present information and research findings in a more visually appealing way.
- Anyone who needs to quickly visualize data without complex spreadsheet software and wants a free infographic maker or online presentation software.
- Users who are considering Visme’s paid plans and want to test out its core functionality.
If your primary goal is to turn data into attractive visuals and you can work within the free plan’s constraints (especially the branding), Visme free offers valuable tools.
4. Snappa: The Quick Social Media Specialist
Snappa is designed with one primary goal in mind: to help users create social media graphics, blog visuals, and ads as quickly and painlessly as possible. It prides itself on its speed and ease of use, targeting marketers and entrepreneurs who need to produce professional-looking online graphics without getting bogged down in complex features.
Key Features of Snappa’s Free Plan
Snappa’s “Starter” free plan is quite limited, particularly in terms of usage, but it gives a good taste of its capabilities:
- Pre-sized Templates: Access to thousands of templates perfectly dimensioned for various social media platforms (Facebook, Instagram, X, LinkedIn, Pinterest, YouTube thumbnails, etc.) and blog posts.
- Large Stock Photo Library: Snappa provides access to a substantial library of royalty-free HD photos and graphics (from sources like Unsplash and Pexels), even on the free plan. Some assets might be marked as premium.
- Simple Graphics Editor: A straightforward editor with layers, text tools, shapes, graphics, and effects. It’s easy to learn and use.
- Background Remover (Limited): The free plan includes a few uses (e.g., 1 per month) of their background removal tool.
- Extremely Limited Downloads: This is the biggest constraint: the free plan typically allows only 3 downloads per month.
- Single User: The free plan is for one user only.
- No Custom Font Uploads: You’re limited to the fonts provided within Snappa on the free tier.
User Interface and Ease of Use
Snappa’s user interface is exceptionally clean, minimalist, and intuitive. It’s arguably one of the easiest tools to pick up and use immediately. When you start a new design, you first choose the dimensions or a pre-sized template. The editor then presents a canvas with a left sidebar for adding backgrounds (photos, patterns, colors), text, graphics (vectors, shapes), and effects. Customization options appear when an element is selected. The entire experience is geared towards rapid creation. You can find a template, swap out the text and image, and have a graphic ready in minutes.
Strengths (Pros)
- Extremely Fast for Social Media Content: If speed is your top priority for social media graphics, Snappa excels.
- Good Selection of High-Quality Stock Photos: Easy access to a large, free stock image library is a significant plus.
- Very User-Friendly Interface: Minimal learning curve; perfect for those who find other tools too complicated.
- Well-Designed Templates: The templates are modern and optimized for social media engagement.
Limitations (Cons) of the Free Plan
The free plan’s limitations are quite severe and make it more of a trial than a long-term free solution for most users:
- Strict Download Limits: Only 3 downloads per month is highly restrictive for anyone needing to create graphics regularly. This is the most significant drawback.
- Limited Features Compared to Competitors: Lacks the broader feature set of tools like Canva or the vector capabilities of Figma.
- No Custom Font Uploads in Free Plan: Restricts branding consistency if you use specific brand fonts.
- Fewer Template Categories Beyond Social Media/Blogs: While it excels at these, it’s less versatile for other design types like presentations or print documents.
- No Buffer Integration on Free Plan: While Snappa is known for its integration with the Buffer social media scheduling tool, this is a premium feature.
Who is Snappa Best For?
Given its severe download limitation, Snappa’s free plan is best for:
- Individuals or very small businesses who only need to create a handful (1-3) of social media graphics or blog images each month and prioritize speed and ease of use above all else.
- Users who want to thoroughly test Snappa’s interface and features before committing to a paid plan.
- Those looking for a quick image editor specifically for social media and who can work within the download constraints.
While Snappa free offers a slick and fast design experience, its free plan is more of a “taste test” due to the download cap.
5. Pixlr (Pixlr X and Pixlr E): The Online Photo Editing Power Duo
Pixlr has been a well-known name in the online photo editing space for many years. It offers a suite of tools, with its two main web-based editors, Pixlr X (Express) and Pixlr E (Editor), catering to different user needs and skill levels. While primarily focused on photo manipulation, they also offer basic design capabilities, making them versatile free options.
Key Features of Pixlr’s Free Plans
Both Pixlr X and Pixlr E are available for free, supported by ads. They offer a good range of functionalities:
- Pixlr X (Express):
- Simple, Intuitive Interface: Designed for quick and easy edits. It’s very beginner-friendly.
- One-Click Tools: Includes numerous pre-set filters, effects (like overlays, borders), and adjustments (brightness, contrast, saturation, vibrance, etc.).
- Basic Design Tools: You can add text, simple shapes, and elements/stickers to your images. It also has template options for social media posts, collages, etc.
- AI CutOut Tool (Limited Free Use): Offers an AI-powered background removal tool, though free usage might be restricted (e.g., a few uses per day or watermarked).
- Basic Retouching: Tools for healing, cloning, sharpening, and blurring.
- Pixlr E (Editor):
- More Photoshop-Like Interface: This editor is geared towards users familiar with traditional desktop photo editing software like Adobe Photoshop or GIMP. It offers more control and advanced features.
- Layers, Masks, and Brushes: Supports layers, layer masks, various brush types, and blending modes for complex editing.
- Advanced Color Correction: Tools for levels, curves, color balance, and HSL adjustments.
- Selection Tools: Includes marquee, lasso, wand, and cut-out tools for precise selections.
- Supports Various File Formats: Can open and save in formats like PXD (Pixlr’s native format), JPG, PNG, WebP, and even PSD (Photoshop files, with some limitations).
- Common Features (Free Versions):
- Ad-Supported: Both free versions display advertisements, which can sometimes be intrusive.
- Access to Stock Assets: Pixlr offers a library of stock photos, overlays, stickers, and decorative texts, though many premium assets are locked behind a subscription.
User Interface and Ease of Use
- Pixlr X: The interface is modern, clean, and very straightforward. Tools are clearly labeled with icons and simple sliders, making it ideal for beginners or users who want to make quick adjustments without a fuss.
- Pixlr E: The interface is more complex and closely mirrors that of desktop photo editors. It has a steeper learning curve but provides much greater control for those who need it. Users with prior Photoshop experience will find it relatively familiar.
The ability to switch between these two interfaces is a key strength of the Pixlr ecosystem.
Strengths (Pros)
- Powerful Photo Editing Capabilities: For a free online tool, especially Pixlr E, the range and depth of photo editing features are impressive.
- Two Distinct Interfaces: Caters to both beginners (Pixlr X) and more experienced users (Pixlr E) effectively.
- Good Range of Tools: From one-click filters and basic adjustments to advanced layer-based manipulation.
- No Download Limits (but with Ads): Unlike some competitors, you can generally save as many edited images as you want, though you’ll have to contend with ads.
- PSD File Support (Pixlr E): The ability to open and save PSD files is a bonus for those who occasionally work with Photoshop files.
Limitations (Cons) of the Free Plan
- Ads Can Be Intrusive: The presence of display ads is a common trade-off for free software and can sometimes disrupt the workflow.
- Premium Tools and Assets: Many of the most advanced AI tools (e.g., unlimited AI CutOut, advanced filters), a wider selection of assets, and an ad-free experience are part of Pixlr Premium.
- Less Focused on Template-Based Graphic Design: While Pixlr X offers some templates, its core strength is photo manipulation, not creating designs from scratch using extensive template libraries like Canva.
- Saving Quality/Format Restrictions: While generally good, there might be subtle limitations on output quality or access to all format options in the free tier compared to premium.
Who is Pixlr Best For?
Pixlr X and Pixlr E are excellent free online photo editor choices for:
- Users whose primary need is photo editing, ranging from quick touch-ups and filter applications (Pixlr X) to more detailed and complex image manipulation (Pixlr E).
- Bloggers and social media users who need to enhance their photos before posting.
- Photographers looking for a quick online tool for basic edits when away from their main desktop software.
- Anyone needing a free online photo editor that offers a good balance of ease of use and powerful features without requiring downloads.
- Those who occasionally need to do some photo manipulation online or work with PSD files without having Photoshop.
If photo enhancement is your main goal, Pixlr free (in its X or E variant) is a very strong contender.
Comparing the Top 5: A Quick Glance
Choosing the right free online graphic editor depends heavily on your specific needs, technical comfort level, and the types of projects you’ll be undertaking. Here’s a simplified comparison to help you decide:
Feature Matrix
| Feature | Canva | Figma | Visme | Snappa | Pixlr (X/E) |
|---|---|---|---|---|---|
| Primary Focus | All-purpose design, Social Media | UI/UX, Vector Graphics, Collaboration | Infographics, Presentations, Data Viz | Quick Social Media Graphics | Photo Editing |
| Ease of Use | Very Easy | Moderate (Steeper for non-designers) | Easy to Moderate | Very Easy | X: Very Easy, E: Moderate to Advanced |
| Templates (Free) | Extensive, Varied | Community-driven, UI Kits | Good for Niche, Limited Overall | Good for Social, Limited Overall | Basic, More for Photo Layouts |
| Photo Editing | Basic to Good | Basic (not primary focus) | Basic | Basic | Excellent (X: Good, E: Advanced) |
| Vector Tools | Limited (elements are vector, but not a full editor) | Excellent | Basic Shapes | Basic Shapes | No (Raster-based) |
| Collaboration (Free) | Good (sharing, basic real-time) | Excellent (real-time, FigJam) | Very Limited | No | No |
| Key Free Plan Limits | Premium features/assets, 5GB storage | 3 team files, Limited team features | Visme branding, 100MB storage, 5 projects, JPG only | 3 downloads/month | Ads, Some premium AI/assets |
| Ideal For | Beginners, Social Media, Quick Designs | UI/UX, Logos, Scalable Graphics, Teams | Data Reports, Infographics (with branding) | Ultra-quick, infrequent social posts | Photo touch-ups & advanced editing |
Which Tool is Right for You?
- If you need an all-around, incredibly easy-to-use tool with tons of templates for social media, presentations, and general graphics: Canva is likely your best bet.
- If you need powerful vector editing for logos, icons, UI/UX design, or want top-notch real-time collaboration: Figma offers professional-grade capabilities for free (with a learning curve).
- If your primary focus is creating infographics, data visualizations, or engaging presentations and you don’t mind Visme branding (or are testing for a paid plan): Visme has specialized tools for this.
- If you need to create just a few social media graphics super quickly each month and value extreme simplicity: Snappa is fast, but be very aware of the 3-download limit.
- If your main task is editing photos, from quick fixes to more advanced manipulations: Pixlr (X for ease, E for power) is a dedicated photo editing suite online.
Don’t be afraid to try out a couple of these tools. Since they are free and browser-based, experimenting is easy and will help you find the perfect fit for your workflow and creative goals.
Tips for Getting Professional Results with Free Online Editors
Using free tools doesn’t mean your designs have to look amateurish. With a bit of know-how and attention to detail, you can create truly professional-looking graphics. Here are some tips:
Start with a Clear Goal and Audience
Before you even open an editor, ask yourself:
- What is the purpose of this design? (e.g., to inform, to sell, to engage, to build brand awareness)
- Who am I trying to reach? (e.g., their age, interests, preferences) Understanding your goal and audience will guide your design choices, from color palette to typography and imagery, ensuring your message resonates effectively.
Leverage Templates Wisely
Templates are fantastic starting points, but don’t just use them as-is if you want a unique, professional look.
- Use templates as inspiration or a structural guide.
- Customize them thoroughly: Change colors to match your brand, swap out fonts, replace stock images with your own or more unique free options, and adjust layouts to better fit your content. The goal is to make the template your own.
Master the Basics of Design Principles
You don’t need to be a design guru, but understanding a few fundamental principles can elevate your work significantly:
- Hierarchy: Arrange elements so the most important information stands out first. Use size, color, and placement to guide the viewer’s eye.
- Contrast: Create visual interest and improve readability by using contrasting colors, fonts (e.g., a bold headline with a simpler body text), or sizes.
- Alignment: Keep your design tidy and organized by aligning elements to a grid or to each other. Avoid randomly placing items.
- Repetition: Repeat visual elements like colors, fonts, or shapes throughout your design (and across multiple designs for branding) to create consistency and unity.
- Proximity: Group related items together to create a clear visual connection and reduce clutter.
- Color Theory Basics: Choose colors that work well together and evoke the right mood. Use online color palette generators if you’re unsure.
- Typography Choices: Select legible fonts. Don’t use too many different fonts in one design (2-3 is usually enough). Ensure good contrast between text and background.
Keep it Simple and Clean
Often, less is more. A cluttered design can be confusing and unprofessional.
- Focus on clear messaging.
- Leave enough white space (negative space): This gives your elements room to breathe and improves readability.
- Avoid using too many colors, fonts, or distracting elements.
Pay Attention to Image Quality
- Use high-resolution images whenever possible. Blurry or pixelated images scream “amateur.”
- Ensure proper licensing for any stock assets you use. All the tools listed provide access to free stock photos, but always double-check the usage rights if you’re sourcing images from elsewhere.
Be Mindful of Free Plan Limitations
Work within the constraints of the free plan you’re using. If a tool puts a watermark on your design, or severely limits downloads, it might not be suitable for all your professional needs. Sometimes, if your design work becomes critical, upgrading to a paid plan for your favorite tool can be a worthwhile investment for removing limitations and unlocking more powerful features.
By applying these graphic design tips, you can significantly enhance the quality of your visuals and achieve professional design free of charge.
The Future of Online Graphic Editors
The world of online graphic editors is constantly evolving, and the future looks incredibly exciting. We’re already seeing several key trends shaping these platforms:
- AI-Powered Design: Artificial intelligence is playing an increasingly significant role. Features like AI background removal, content-aware fill, automatic resizing, and even AI-generated design suggestions are becoming more common. We can expect AI graphic design tools to become even more sophisticated, helping users create stunning visuals faster and more intuitively.
- Increased Collaboration: Real-time collaboration, already a strong suit for tools like Figma, will likely become standard across more platforms. This facilitates teamwork, streamlines feedback processes, and allows for more dynamic design workflows.
- Mobile-First Design and Editing: With more content being consumed and created on mobile devices, online editors are improving their mobile-friendliness, offering dedicated apps or highly responsive web interfaces for designing on the go.
- Deeper Integrations: Expect tighter integrations with other platforms and services, such as social media schedulers, cloud storage providers, marketing automation tools, and stock asset libraries. This will create more seamless workflows for users.
- Greater Accessibility and Power: The gap between free online editors and traditional professional desktop software continues to narrow. Free tools will likely gain even more advanced features, making professional-grade design accessible to an even wider audience.
These online editor trends point towards a future where creating high-quality, professional graphics is easier, faster, and more accessible than ever before.
Conclusion: Design Like a Pro, For Free
Creating compelling, professional-looking designs is no longer the exclusive domain of seasoned designers with expensive software. As we’ve explored, the landscape of free online graphic editors offers a wealth of powerful, user-friendly options that can help anyone bring their creative visions to life. Whether you’re crafting social media posts with Canva, designing intricate vector graphics in Figma, visualizing data with Visme, whipping up quick visuals in Snappa, or perfecting photos with Pixlr, there’s a tool out there to match your needs and skills.
The key benefits are clear: unparalleled accessibility, zero cost, intuitive interfaces, and a vast array of templates and resources to get you started. While free plans come with limitations, they often provide more than enough firepower for a wide range of personal and professional projects. By understanding basic design principles and leveraging the strengths of these platforms, you can produce visuals that not only look great but also achieve your communication goals effectively.
So, don’t let a lack of budget or formal design training hold you back. We encourage you to dive in, experiment with the tools we’ve highlighted, and discover which one best empowers your creativity. The ability to start designing online today and craft impressive visuals is literally at your fingertips. Happy designing!