This post may contain affiliate links. If you make a purchase through these links, we may earn a commission at no additional cost to you.
Have you ever wondered what makes your computer tick? What kind of processor it has, how much memory is installed, or what motherboard everything is plugged into? For many PC users, these details can seem like a mystery hidden deep within their machine. But understanding your system’s specifications isn’t just for tech experts; it’s incredibly useful for everyone. Whether you’re planning an upgrade, troubleshooting a performance issue, or simply curious about your hardware, knowing your specs is the first step.
That’s where CPU-Z comes in. This free, lightweight utility is an indispensable tool for anyone who wants to get a clear, concise, and incredibly detailed look at their computer’s core components. It pulls back the curtain, revealing crucial information about your Central Processing Unit (CPU), motherboard, memory (RAM), and even your graphics card. Think of it as a diagnostic X-ray for your PC, giving you precise data that Windows’ built-in tools often can’t provide.
In this comprehensive guide, we’ll walk you through everything you need to know about CPU-Z. We’ll show you how to download and install it safely, navigate its intuitive interface, and most importantly, how to interpret the wealth of information presented in each tab. By the end, you’ll feel confident in your ability to understand your system’s vital statistics, empowering you to make informed decisions about your PC’s health and future. Let’s dive in and unlock the secrets of your computer!
Getting Started with CPU-Z
Before we explore the detailed insights CPU-Z offers, let’s cover the basics: what it is, why it’s so useful, and how to get it onto your computer.
What is CPU-Z and Why is it Indispensable?
At its heart, CPU-Z is a small, free software utility designed by CPUID. Its primary purpose is to gather and display detailed information about the main hardware components of your computer. While its name suggests a focus on the CPU, it actually provides a comprehensive overview of your processor, motherboard, system memory (RAM), and even some basic details about your graphics card. It’s like having a super-detailed inventory of your PC’s most critical parts, all presented in an easy-to-read format.
Why is this tool considered indispensable by PC enthusiasts, gamers, and even casual users? For starters, operating systems like Windows offer only limited information about your hardware. You might see your processor’s general name or the total amount of RAM, but you won’t get the granular details that CPU-Z provides. For example, Windows won’t tell you your RAM’s exact clock speed, its specific timings, or the manufacturer of your motherboard’s chipset. These are critical pieces of information for several reasons:
- Upgrades: If you’re thinking about adding more RAM, upgrading your CPU, or even getting a new graphics card, you need to know what your current system can support. CPU-Z tells you your motherboard’s model, the type of RAM you have (e.g., DDR4, DDR5), and the specific socket type of your CPU, all of which are vital for compatibility.
- Troubleshooting: When your PC isn’t performing as expected, detailed hardware information can help pinpoint the problem. Is your RAM running at its advertised speed? Is your CPU throttling due to heat? CPU-Z can provide clues by showing real-time clock speeds and voltages.
- Verification: Did you just buy a new component or a pre-built PC? CPU-Z allows you to verify that the components installed match what was advertised. This ensures you’re getting exactly what you paid for.
- Benchmarking and Comparison: The tool includes a basic benchmarking feature, allowing you to quickly test your CPU’s performance and compare it against other processors. This is great for seeing how your system stacks up.
In essence, CPU-Z empowers you with knowledge about your PC’s inner workings. It demystifies the hardware, making it easier to understand, maintain, and upgrade your system.
Downloading and Installing CPU-Z Safely
Getting CPU-Z onto your computer is a straightforward process, but it’s crucial to do it safely to avoid any unwanted software.
The official source for CPU-Z is the CPUID website. Always download the software directly from their official site (cpuid.com). Avoid third-party download sites, as they might bundle the software with unwanted programs or even malware.
You’ll typically find two main versions available:
- Installer Version: This is the traditional setup file that installs CPU-Z onto your system like any other program. It creates shortcuts in your Start Menu and on your desktop, and you can uninstall it later through your system’s Add or Remove Programs feature. This is often the preferred choice for most users.
- Portable Version: This version doesn’t require installation. You simply download a ZIP file, extract its contents, and run the executable file directly. This is great if you want to run CPU-Z from a USB drive, or if you prefer not to install software on your main system. It leaves no traces on your system registry once you close it.
Here’s a step-by-step guide for installation (for the installer version):
- Visit the Official Website: Open your web browser and go to
www.cpuid.com/softwares/cpu-z.html. - Choose Your Version: On the download page, look for the latest stable version. You’ll usually see options for “Setup English” (installer) and “ZIP English” (portable). Click on the “Setup English” link to download the installer.
- Run the Installer: Once the download is complete, locate the
.exefile (it will likely be in your Downloads folder) and double-click it to start the installation process. - Follow On-Screen Prompts:
- You might see a User Account Control (UAC) prompt asking for permission to run the installer. Click “Yes.”
- Read and accept the License Agreement.
- Choose the installation location. The default location is usually fine.
- Decide if you want a desktop shortcut or a Start Menu folder.
- Click “Install” and then “Finish” once the process is complete.
- Launch CPU-Z: You can now launch CPU-Z from your desktop shortcut or Start Menu.
Safety Considerations: The most important rule is to always download from the official CPUID website. This minimizes the risk of downloading malicious software. CPU-Z itself is a highly reputable and safe tool, widely used by millions of users worldwide.
Navigating the CPU-Z Interface: A Tab-by-Tab Breakdown
Once you launch CPU-Z, you’ll be greeted by a compact window with several tabs across the top. Each tab provides detailed information about a specific component of your system. Let’s go through each one systematically.
The CPU Tab: Decoding Your Processor’s Core
The CPU tab is often the first one you’ll see, and it’s packed with essential information about your computer’s brain: the Central Processing Unit. Understanding these details can help you gauge your system’s performance and compatibility.
Processor Name and Code Name
At the very top, you’ll find the Name field, which tells you the exact brand and model of your CPU. For example, you might see “Intel Core i7-12700K” or “AMD Ryzen 7 5800X.” This is the most straightforward identifier for your processor.
Below the name, you’ll see the Code Name. This refers to the internal development name given to a particular generation or architecture of processors by the manufacturer. For instance, an Intel Core i7-12700K uses the “Alder Lake” code name, while an AMD Ryzen 7 5800X is based on the “Vermeer” architecture. These code names often indicate significant architectural changes and improvements over previous generations. Knowing the code name can be useful when researching specific features or limitations of your CPU’s architecture.
Package and Technology
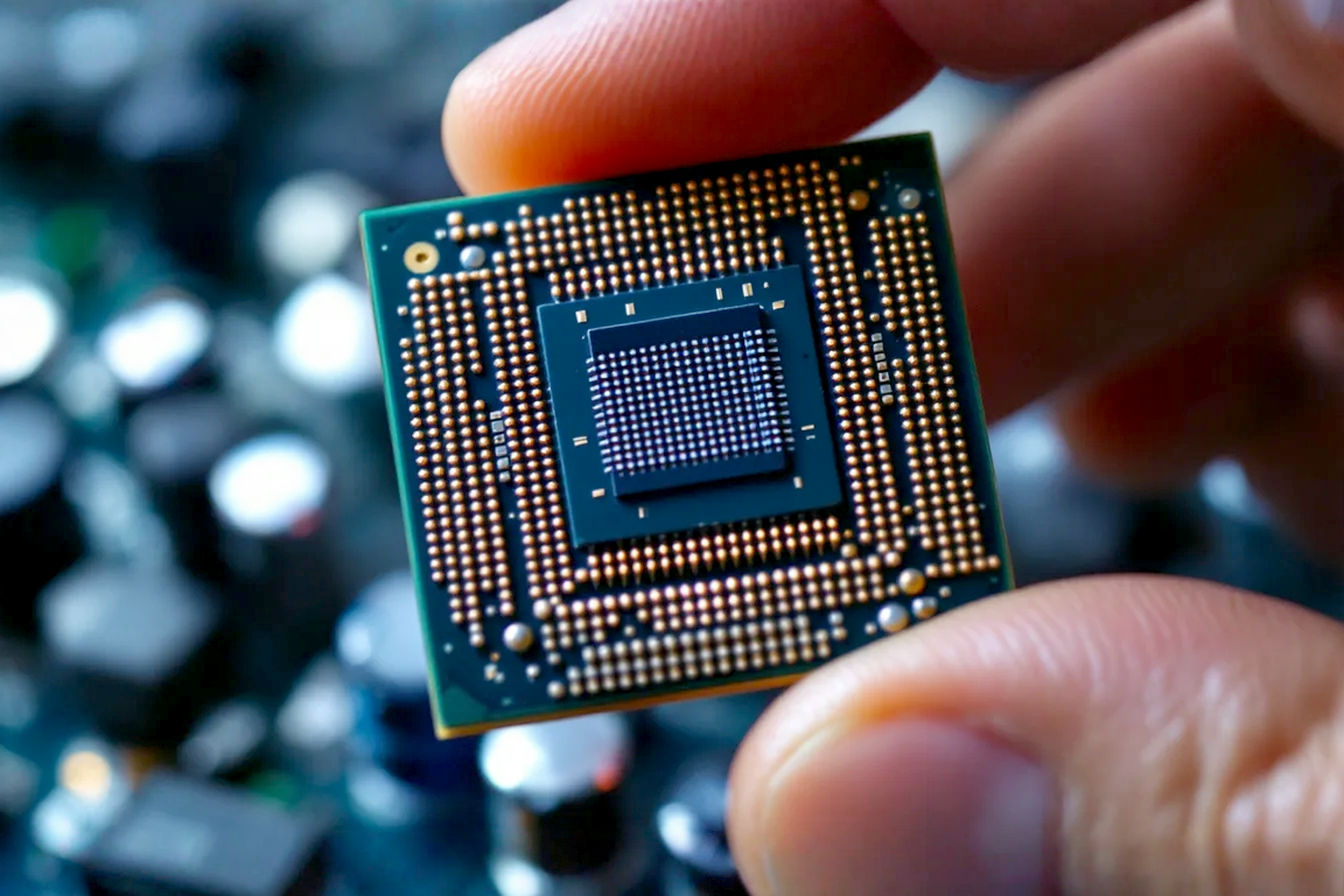
The Package field specifies the type of socket your CPU uses to connect to the motherboard. This is crucial for compatibility if you ever plan to upgrade your processor. For example, “LGA1700” is a common Intel socket, while “AM4” is prevalent for many AMD Ryzen CPUs. A CPU designed for one socket type cannot be physically installed into a motherboard with a different socket type.
Technology refers to the manufacturing process size, measured in nanometers (nm). This number indicates the size of the individual transistors on the CPU die. A smaller nanometer number generally means more transistors can be packed into the same space, leading to improved efficiency, lower power consumption, and often better performance. For instance, a CPU manufactured with “10nm” technology has smaller transistors than one made with “14nm” technology. This is a key indicator of the CPU’s generation and its underlying fabrication process.
Core Voltage and Specifications
The Core Voltage (Vcore) displays the current voltage supplied to your CPU’s core. This value can fluctuate based on the CPU’s workload and power management settings. While not something you typically need to adjust, monitoring Vcore can be useful for stability testing, especially during overclocking.
Under Specifications, you’ll find more technical identifiers for your CPU:
- Family, Model, Stepping, Revision: These are internal identifiers used by the CPU manufacturer to denote specific versions and revisions of the processor. They are primarily for advanced users or troubleshooting and typically don’t require deep understanding for general use.
- Instructions: This lists the various instruction sets supported by your CPU. Instruction sets are collections of commands that the processor understands and can execute. Common examples include SSE (Streaming SIMD Extensions), AVX (Advanced Vector Extensions), and FMA (Fused Multiply-Add). These instruction sets enable the CPU to perform certain types of calculations more efficiently, which can impact performance in specific applications or games that utilize them. For example, video encoding or scientific simulations often benefit from modern instruction sets.
Clocks (Core Speed, Multiplier, Bus Speed)
This section is vital for understanding how fast your CPU is currently operating.
- Core Speed: This is the actual, real-time clock speed of your CPU’s cores, measured in Megahertz (MHz) or Gigahertz (GHz). This value will dynamically change based on your CPU’s workload. When idle, it might drop to save power, and under load, it will boost to its maximum frequency. This is the most direct indicator of your CPU’s current processing speed.
- Multiplier: The multiplier is a ratio that, when multiplied by the Bus Speed, determines the Core Speed. For example, if your Bus Speed is 100 MHz and your multiplier is 40, your Core Speed will be 4000 MHz or 4.0 GHz.
- Bus Speed: Also known as the Base Clock (BCLK) in modern systems, this is the fundamental clock speed from which other frequencies in your system are derived. For most modern Intel and AMD systems, the BCLK is typically 100 MHz.
- Rated FSB (Front Side Bus): This term is largely historical, referring to an older architecture where the CPU communicated with the Northbridge via a dedicated bus. In modern systems, this concept has evolved, and the Bus Speed (BCLK) is the relevant metric.
Caches (L1, L2, L3)
Caches are small, extremely fast memory blocks built directly into the CPU. They store data that the CPU is likely to need again very soon, reducing the time it takes to fetch information from slower main memory (RAM). Think of them as the CPU’s personal scratchpad.
CPU-Z shows the sizes of different levels of cache:
- L1 Data and L1 Inst.: These are the smallest and fastest caches, closest to the CPU cores. L1 Data stores data, while L1 Inst. stores instructions. Each core typically has its own L1 cache.
- L2: Larger and slightly slower than L1, but still much faster than RAM. Each core might have its own L2 cache, or a group of cores might share one.
- L3: The largest and slowest of the CPU caches, but still significantly faster than RAM. L3 cache is typically shared by all cores on the CPU.
The larger the cache sizes, generally the better, as it means the CPU can store more frequently accessed data closer to its processing units, leading to fewer delays.
Cores and Threads
This section tells you about your CPU’s ability to handle multiple tasks simultaneously.
- Cores: This indicates the number of physical processing units within your CPU. Each core can execute instructions independently. A CPU with more physical cores can handle more tasks at the same time, which is beneficial for multi-threaded applications like video editing, 3D rendering, or running multiple programs concurrently.
- Threads: This refers to the number of logical or virtual processing units. Technologies like Intel’s Hyper-Threading or AMD’s Simultaneous Multi-Threading (SMT) allow each physical core to handle two threads simultaneously. This makes the operating system “think” there are more cores than there actually are, improving efficiency for certain workloads by allowing the CPU to work on two parts of a task at once. So, an 8-core CPU with Hyper-Threading would show 16 threads.
The Caches Tab: Understanding CPU’s Internal Memory
While the CPU tab gives you a summary of your caches, the dedicated Caches tab offers a more detailed, organized view of the L1, L2, and L3 cache configurations. This tab simply reiterates and sometimes expands upon the cache information found on the CPU tab, presenting it in a clearer, more segmented format.
You’ll see distinct sections for each cache level (L1, L2, L3), detailing their size and descriptive characteristics. For instance, it might specify “8-way associative” or “64-byte line size,” which are technical details about how the cache is organized and how it fetches data. While these specifics are often beyond the scope of general user understanding, the main takeaway is that this tab confirms the presence and size of these critical, high-speed memory components within your CPU. Understanding that these caches exist and are distinct layers of memory helps to grasp how modern CPUs achieve their impressive processing speeds by minimizing the need to constantly access slower main system RAM.
The Mainboard Tab: Your System’s Foundation
The Mainboard tab provides crucial information about your motherboard, the central circuit board that connects all your computer’s components. Knowing your motherboard’s details is essential for compatibility when upgrading or troubleshooting.
Manufacturer and Model
At the top, you’ll find the Manufacturer (e.g., “ASUS,” “MSI,” “Gigabyte,” “ASRock”) and the precise Model name of your motherboard (e.g., “ROG STRIX Z690-F GAMING WIFI,” “B550 AORUS ELITE”). This is arguably the most important piece of information on this tab. If you ever need to download drivers, update your BIOS, or check for component compatibility, this model name is what you’ll use to search on the manufacturer’s website. It uniquely identifies the specific features and capabilities of your motherboard.
Chipset and Southbridge
The Chipset is a set of integrated circuits on the motherboard that manages data flow between the CPU, memory, and peripherals. In older motherboard designs, there were typically two main chips: the Northbridge and the Southbridge.
- The Northbridge (often just “Chipset” in CPU-Z for older systems) was responsible for high-speed communications, including the CPU, RAM, and graphics card (PCIe).
- The Southbridge (often labeled “Southbridge” or “PCH – Platform Controller Hub” in modern systems) handled slower peripherals like USB ports, SATA drives, audio, and network interfaces.
In modern CPU architectures (especially with Intel’s recent designs and AMD’s APUs), much of the Northbridge functionality, such as the memory controller and PCIe lanes, has been integrated directly into the CPU itself. The remaining chipset component is often referred to as the Platform Controller Hub (PCH) by Intel or simply the “Chipset” by AMD, which largely performs the functions of the traditional Southbridge. CPU-Z will display the specific model of this chipset (e.g., “Intel Z690,” “AMD B550”), which dictates the features and capabilities of your motherboard, such as the number of USB ports, SATA ports, and M.2 slots it supports.
BIOS Information
The BIOS (Basic Input/Output System) is the firmware that initializes your computer’s hardware components during startup before the operating system loads. CPU-Z displays:
- Brand: The manufacturer of your BIOS (e.g., “American Megatrends Inc.”).
- Version: The specific version number of your BIOS firmware (e.g., “2204”).
- Date: The release date of that BIOS version.
Keeping your BIOS updated can provide support for newer CPUs, improve system stability, or fix bugs. Knowing your current BIOS version and date helps you determine if an update is necessary or available from your motherboard manufacturer’s website.
Graphic Interface
This section details how your graphics card connects to the motherboard.
- Version: This indicates the PCI Express (PCIe) version of the slot your graphics card is using (e.g., “PCI-Express 4.0”). Newer PCIe versions offer higher bandwidth, meaning faster data transfer between the GPU and the CPU.
- Link Width: This shows the number of active PCIe lanes your graphics card is currently using (e.g., “x16”). A graphics card typically uses 16 lanes (x16) for maximum performance. If it shows fewer lanes (e.g., x8), it could indicate a configuration issue, a less powerful slot, or that the card doesn’t require all 16 lanes.
- Max. Supported: This tells you the maximum PCIe version and link width that the slot on your motherboard can support. For example, it might say “PCI-Express 4.0 (x16)” even if your current card is only using PCIe 3.0. This is useful for future upgrade planning.
The Memory Tab: Your RAM’s Vital Statistics
The Memory tab provides a snapshot of your system’s main memory, or RAM (Random Access Memory). RAM is crucial for multitasking and running applications, as it stores data that the CPU needs to access quickly.
Type and Size
- Type: This tells you the generation of your RAM (e.g., “DDR4,” “DDR5”). Different DDR generations are not compatible with each other, so this is critical for upgrades. You can’t mix DDR4 with DDR5.
- Size: This shows the total amount of RAM installed in your system, measured in Megabytes (MB) or Gigabytes (GB). For example, “16 GBytes” means you have 16 gigabytes of RAM. More RAM generally allows you to run more programs simultaneously and handle larger files without your system slowing down.
Channels and DC Mode
- Channels: This indicates how your RAM modules are configured.
- Single: Only one RAM stick is installed, or multiple sticks are installed in a way that only one channel is active. This offers the lowest memory bandwidth.
- Dual: Two or four RAM sticks are installed in specific slots on your motherboard to enable dual-channel mode. This effectively doubles the memory bandwidth compared to single-channel, significantly improving performance in many applications and games.
- Quad: Four or eight RAM sticks are installed to enable quad-channel mode, which further increases bandwidth. This is typically found on high-end desktop platforms or server motherboards.
- DC Mode (Dual Channel Mode): This field will confirm if dual-channel mode is active (e.g., “Symmetric” or “Asymmetric”). “Symmetric” means you have identical RAM modules (same size, speed, timings) installed correctly for dual channel. “Asymmetric” means you have mismatched modules but dual channel is still partially active. For optimal performance, aim for “Symmetric” dual-channel configuration.
DRAM Frequency and CAS# Latency
This section is critical for understanding your RAM’s actual operating speed and its timings.
- DRAM Frequency: This is the actual clock speed of your RAM modules, measured in MHz. It’s important to note that for DDR (Double Data Rate) memory, the effective speed is double this value. So, if CPU-Z shows “DRAM Frequency 1600 MHz,” your RAM is effectively running at 3200 MT/s (MegaTransfers per second), which is commonly marketed as “DDR4-3200.” This is the real speed at which your RAM is operating.
- FSB:DRAM: This shows the ratio between your CPU’s Front Side Bus (or Base Clock) and your DRAM frequency. For most modern systems, this ratio is automatically set, but it can be manually adjusted in the BIOS for overclocking.
- Timings: These are a series of numbers that represent the latency of your RAM, measured in clock cycles. Lower numbers generally indicate faster response times. The most common timings you’ll see are:
- CAS# Latency (CL): The delay between when the memory controller requests data and when the data is available. This is often the most talked-about timing.
- RAS# to CAS# Delay (tRCD): The delay between activating a row and activating a column to access data.
- RAS# Precharge (tRP): The time it takes to precharge a row before another row can be accessed.
- Cycle Time (tRAS): The total time required to access a row of data.
- Row Refresh Cycle Time (tRC): The time it takes to refresh a row of memory.
- Command Rate (CR): The delay between when a chip select is asserted and when a command can be issued. Usually 1T or 2T.
These timings, along with the DRAM Frequency, determine your RAM’s overall performance. While a higher frequency is generally better, tighter (lower) timings at a given frequency can also significantly improve performance.
The SPD Tab: Deeper Dive into RAM Modules
The SPD (Serial Presence Detect) tab offers an even more granular look at your RAM, providing specific details for each individual memory module installed in your system. This tab is incredibly useful for verifying the exact specifications of each stick, especially if you’re mixing and matching RAM or troubleshooting compatibility issues.
At the top of the SPD tab, you’ll see a dropdown menu labeled “Memory Slot Selection.” This allows you to choose which physical RAM slot (Slot #1, Slot #2, etc.) you want to inspect. As you select each slot, the information below will update to reflect the details of the RAM module installed in that specific slot. If a slot is empty, it will typically show “Empty.”
For each selected slot, you’ll find a wealth of information:
- Module Size: The capacity of that individual RAM stick (e.g., “8 GBytes”).
- Max Bandwidth: The maximum theoretical data transfer rate of that specific module (e.g., “DDR4-3200 (1600 MHz)”). This is the speed the module is rated for.
- Manufacturer: The company that made the RAM module (e.g., “Kingston,” “Corsair,” “Samsung”).
- Part Number: The unique identifier assigned by the manufacturer to that specific RAM module (e.g., “CMK16GX4M2B3200C16”). This is extremely helpful for finding exact replacements or matching modules.
- Serial Number: A unique serial number for the individual RAM stick.
- Week/Year: The week and year of manufacture for the module.
Below these general details, you’ll find the JEDEC Timings Table. JEDEC is an industry standard for memory, and this table lists various supported frequency and timing profiles that the RAM module can operate at. Each row represents a different “profile” with a specific frequency and corresponding timings (CL, tRCD, tRP, tRAS, tRC, etc.). These are the standard, guaranteed speeds and timings for the module.
Crucially, if your RAM supports XMP (Extreme Memory Profile) (for Intel platforms) or DOCP/EXPO (for AMD platforms), you’ll see additional profiles listed, often labeled “XMP-3200” or similar. These are pre-defined overclocking profiles set by the RAM manufacturer to achieve higher speeds and tighter timings than the standard JEDEC profiles. To activate these XMP/DOCP profiles, you usually need to enable them in your motherboard’s BIOS, as they don’t automatically apply. The SPD tab will show you the specific frequency and timing values for these XMP profiles, which is what the RAM is advertised to run at.
Why is the SPD tab so crucial?
- Verifying Individual Module Specs: It allows you to confirm that each RAM stick is indeed what you think it is, especially if you bought a kit or are adding new modules.
- Identifying Mismatched RAM: If you have different RAM sticks installed, the SPD tab will highlight their individual differences in size, speed, and timings, which can sometimes lead to instability or prevent dual-channel mode from activating correctly.
- Troubleshooting: If your RAM isn’t running at its advertised speed, the SPD tab helps you confirm what speeds are actually programmed into the module and whether XMP is available.
The Graphics Tab: Your GPU at a Glance
While CPU-Z is primarily focused on the CPU, motherboard, and RAM, it does offer a basic Graphics tab that provides some fundamental information about your dedicated graphics card (GPU). It’s important to note that for a much more comprehensive look at your GPU, a specialized tool like GPU-Z (also from CPUID) is recommended.
On the Graphics tab, you’ll typically find:
- Display Adapter: This shows the name of your graphics card (e.g., “NVIDIA GeForce RTX 3070,” “AMD Radeon RX 6700 XT”).
- Revision, Die Size, Transistors, Release Date: These are technical details about the GPU chip itself, similar to the CPU information.
- BIOS Version: The firmware version of your graphics card’s BIOS.
- Drivers: The version of the graphics driver currently installed. Keeping drivers updated is crucial for gaming performance and stability.
- Memory Type: The type of memory used by your graphics card (e.g., “GDDR6,” “GDDR6X”).
- Memory Size: The total amount of video memory (VRAM) on your graphics card (e.g., “8192 MBytes” for 8GB).
- Bandwidth: The theoretical maximum data transfer rate of your GPU’s memory.
- GPU Clock, Memory Clock, Shader Clock: These show the current clock speeds of various components within your graphics card. Like the CPU, these speeds can fluctuate based on load.
While this tab provides a good overview, it lacks the sensor monitoring, detailed clock speed graphs, and advanced features that GPU-Z offers. However, for a quick check of your GPU model and basic specs, it’s perfectly adequate.
The Bench Tab: Testing Your CPU’s Muscle
The Bench tab in CPU-Z offers a simple, built-in benchmarking tool to quickly assess your CPU’s performance. It’s not as comprehensive as dedicated benchmarking suites, but it provides a convenient way to get a baseline performance score and compare your CPU against others.
The tab features two main tests:
- Single Thread: This test measures the performance of a single core/thread of your CPU. This is important because many applications, especially older games, are still primarily single-threaded, meaning they rely heavily on the speed of one core.
- Multi Thread: This test measures the combined performance of all your CPU’s cores and threads. This score is crucial for applications that can take advantage of multiple cores, such as video editing, 3D rendering, scientific simulations, and modern games.
To run a benchmark:
- Click the “Bench CPU” button.
- The test will run for a few seconds.
- Once complete, your scores for “Single Thread” and “Multi Thread” will appear.
Below your scores, you’ll see a “Reference” dropdown menu. This allows you to select various other CPUs (e.g., “Intel Core i7-12700K,” “AMD Ryzen 7 5800X”) and compare your CPU’s scores directly against them. This provides a quick visual comparison of how your processor stacks up against others in the market.
Additionally, the Bench tab includes a “Stress CPU” button. This isn’t a benchmark but rather a stability test. Clicking it will put your CPU under 100% load, causing it to generate heat and consume maximum power. This is useful for:
- Checking Cooling: To see if your CPU cooler can adequately handle the heat generated under full load.
- Testing Stability: To check if your system remains stable (doesn’t crash or freeze) when the CPU is under heavy stress, especially after overclocking.
- Verifying Clock Speeds: To ensure your CPU maintains its boost clocks under sustained load and isn’t “throttling” (reducing its speed due to overheating).
To stop the stress test, simply click the “Stop” button. Use the stress test cautiously and monitor your CPU temperatures with a separate tool if possible.
The About Tab: CPU-Z’s Own Information
The final tab, About, provides information about the CPU-Z software itself and offers some useful utilities.
You’ll find:
- Version: The specific version number of the CPU-Z application you’re currently running.
- Author: The developer of the software (CPUID).
- Website: A link to the official CPUID website.
More importantly, this tab offers two key functionalities:
- Validate: Clicking the “Validate” button allows you to upload your system’s specifications to the CPUID website. This generates a unique validation URL that you can share with others. It’s a common practice for enthusiasts to validate their overclocked systems or simply share their build details.
- Save Report: This is an incredibly useful feature. You can save a detailed report of all the information CPU-Z has gathered about your system in two formats:
- TXT (.txt): A plain text file that’s easy to read and share.
- HTML (.html): A more organized and visually appealing report that can be opened in a web browser.
Saving a report is highly recommended for troubleshooting, keeping a record of your system’s specs, or sharing detailed information with technical support or online communities. It captures everything across all tabs into one comprehensive document.
Practical Applications and Advanced Tips
Now that you understand what each tab in CPU-Z reveals, let’s explore some practical ways you can use this powerful tool to your advantage.
Verifying System Specifications for Upgrades
One of the most common uses for CPU-Z is to gather the necessary information before upgrading your PC. This ensures compatibility and helps you avoid costly mistakes.
- RAM Upgrades:
- Go to the Memory tab to find your current RAM Type (DDR4, DDR5). You must buy new RAM of the same type.
- Check the Size to see how much RAM you currently have.
- Look at Channels to see if you’re running in single, dual, or quad-channel mode. For optimal performance, aim for dual-channel (e.g., two 8GB sticks instead of one 16GB stick).
- Switch to the SPD tab and select each occupied slot. Note the Max Bandwidth and Timings (especially CL) of your existing modules. When buying new RAM, try to match these as closely as possible to ensure stability and performance. If your existing RAM uses XMP, make sure your new RAM also supports XMP and has similar profiles.
- CPU Upgrades:
- On the CPU tab, note your processor’s Name and, more importantly, its Package (socket type, e.g., LGA1700, AM4).
- Then, go to the Mainboard tab and find your motherboard’s Manufacturer and Model.
- With this information, visit your motherboard manufacturer’s website. Look for the “CPU Support List” or “Compatibility List” for your specific motherboard model. This list will tell you which CPUs are compatible with your motherboard’s socket and chipset, and which BIOS version you might need to support a newer CPU.
- GPU Upgrades:
- While the Graphics tab in CPU-Z is basic, the Mainboard tab’s Graphic Interface section is crucial. Note the Max. Supported PCIe version (e.g., PCI-Express 4.0) and Link Width (x16). This tells you the maximum bandwidth your motherboard’s primary PCIe slot can provide to a new graphics card. Most modern graphics cards will work in older PCIe slots, but they might be bandwidth-limited if the slot is significantly older (e.g., a PCIe 4.0 card in a PCIe 2.0 slot).
Troubleshooting Performance Issues
CPU-Z can be a valuable diagnostic tool when your PC isn’t performing as expected.
- Verifying Clock Speeds: If your CPU feels slow, open the CPU tab and observe the Core Speed. Is it consistently low, even under load? This could indicate thermal throttling (where the CPU slows down to prevent overheating) or incorrect power settings. Run the “Stress CPU” test on the Bench tab to see if your CPU maintains its boost clocks under sustained load.
- RAM Configuration: If you suspect RAM issues, check the Memory tab. Is your RAM running in single-channel mode when it should be in dual-channel? This is a common oversight that can significantly impact performance. Is the DRAM Frequency lower than what your RAM is rated for? This often happens if XMP/DOCP isn’t enabled in the BIOS, causing the RAM to run at its slower JEDEC default speed. The SPD tab can confirm the advertised XMP profiles.
- Mismatched Components: If you’ve recently added new RAM and are experiencing instability, check the SPD tab for each module. Are their speeds and timings identical? Mismatched RAM can sometimes lead to system crashes or prevent optimal performance.
Overclocking and Stability Checks
For those who like to push their hardware, CPU-Z is an essential companion for overclocking.
- Monitoring Clock Speeds and Voltages: As you adjust CPU frequencies and voltages in your BIOS for overclocking, CPU-Z provides real-time feedback on the CPU tab. You can see the immediate effect of your changes on Core Speed, Multiplier, and Core Voltage.
- Stress Testing: After making overclocking adjustments, the “Stress CPU” feature on the Bench tab is vital. Running this test for an extended period (e.g., 15-30 minutes) helps determine if your overclock is stable under heavy load. If your system crashes, freezes, or experiences errors during the stress test, your overclock is likely unstable and needs further adjustment (usually by increasing voltage slightly or decreasing frequency). Always monitor temperatures with a separate tool during stress testing to prevent overheating.
Comparing Your System with Others
The Bench tab’s built-in comparison feature is a quick way to see how your CPU’s performance stacks up against other popular processors. This can be useful for:
- Evaluating Upgrade Paths: If you’re considering a new CPU, you can benchmark your current one and then compare its score against the CPU you’re considering. This gives you a tangible idea of the performance uplift you might expect.
- General Performance Assessment: It provides a simple metric to understand where your CPU stands in the broader landscape of processors, whether for gaming, productivity, or other tasks.
Exporting Your System Report
The About tab’s “Save Report” feature is incredibly useful for documenting your system’s specifications.
- Troubleshooting: If you’re seeking help from an online forum or technical support, providing a CPU-Z report (either TXT or HTML) gives them all the detailed information they need without you having to manually list everything. This saves time and reduces the chance of errors.
- Record-Keeping: It’s a good practice to save a report when your system is stable and performing well. This creates a baseline that you can refer back to if you encounter issues later or make changes to your hardware.
- Sharing: If you’re showing off your build or discussing hardware with friends, a CPU-Z report is a concise way to share all your component details.
Conclusion
CPU-Z might be a small program, but its utility is immense. It pulls back the curtain on your PC’s most vital components, providing a wealth of detailed information that’s often hidden from plain sight. From understanding the intricate details of your processor’s architecture to decoding your RAM’s precise timings and identifying your motherboard’s exact model, CPU-Z empowers you with knowledge.
Whether you’re a seasoned PC builder, a curious gamer, or just someone looking to troubleshoot a nagging issue, this free tool is an indispensable part of any digital toolkit. It simplifies the complex world of computer hardware, making it accessible to everyone. By mastering its various tabs and understanding the data they present, you’re not just looking at numbers; you’re gaining a deeper appreciation for the technology that drives your digital life.
So, don’t hesitate to download CPU-Z, launch it, and start exploring. You’ll be amazed at what you discover about your own machine. Understanding your system specs isn’t just about technical know-how; it’s about empowering yourself to make smarter decisions, optimize your performance, and truly take control of your computing experience.

