This post may contain affiliate links. If you make a purchase through these links, we may earn a commission at no additional cost to you.
Imagine having the power of a computer and the portability of a phone, connected to the internet wherever you go, without needing to hunt for Wi-Fi. That’s the promise of an LTE tablet. These versatile devices offer incredible freedom, letting you work, stream, browse, and connect from almost anywhere there’s a cellular signal. But choosing the right one and getting it set up can feel a bit complicated, especially when you hear whispers of hidden fees and confusing data plans.
Don’t worry, we’ve got you covered. This guide is designed to walk you through everything you need to know. We’ll help you understand what an LTE tablet is, how to pick the perfect one for your needs, navigate the world of data plans, activate your device smoothly, and most importantly, show you how to spot and avoid those sneaky hidden costs that can inflate your monthly bill. By the end of this article, you’ll feel confident making smart choices and enjoying truly mobile connectivity without any unpleasant surprises.
Understanding LTE Tablets (And Why You Might Want One)
Choosing a tablet often starts with deciding if you need constant internet access away from home or the office. If the answer is yes, an LTE-capable tablet should be on your radar. LTE is what makes that always-on connection possible, similar to how your smartphone gets data when you’re not on Wi-Fi.

-
Rugged Durability: Designed for industrial and field work, it is MIL-STD-810H1 compliant to absorb shocks and IP68-rated for resistance to dust, dirt, sand, and water.
-
5G LTE Connectivity: Equipped with unlocked 5G connectivity for high-speed streaming and rapid downloading while on the move.
-
Flexible Power Options: Features a long-lasting, replaceable battery to maintain productivity. It also includes a “No Battery Mode” that allows the device to run when connected to a dedicated power source without a battery.
-
Responsive Touchscreen: The 8-inch screen is designed to be responsive even when operated with gloves on.
-
S Pen & Accessory Compatibility: Comes with an S Pen included in the box and is backward compatible with other Galaxy Tab Active accessories.
The Appeal of Always-On Connectivity
Think about it: you’re on a train, waiting for a flight, or working from a coffee shop without reliable public Wi-Fi. With an LTE tablet, you don’t skip a beat. You can send that urgent email, join a video call, access files in the cloud, or just stream your favorite show without buffering. This level of freedom is a major draw for many users. It’s not just about convenience; for professionals, it can mean the difference between closing a deal and missing an opportunity. Students can access online resources anywhere on campus, and travelers can stay connected without relying on potentially insecure public networks.
What Exactly is LTE on a Tablet?
At its simplest, LTE stands for Long-Term Evolution. It’s a standard for wireless communication that allows devices like tablets and smartphones to connect to the internet using a cellular network – the same towers your phone uses for calls and data. You can think of it as a much faster, more efficient version of the older 3G technology. When people talk about “4G LTE,” they’re referring to this standard, which was a significant jump in speed and capability compared to 3G.
Technically speaking, LTE is a fourth-generation (4G) wireless broadband technology. It uses different chunks of radio frequency, known as spectrum bands, to transmit data. Unlike older technologies that used circuit-switching (like traditional phone calls), LTE is entirely packet-switched, meaning data is broken into small packets and sent efficiently over the network. This is similar to how data travels over the internet. LTE offers theoretical peak download speeds that can reach up to 100 megabits per second (Mbps) or even higher in later versions like LTE-Advanced. However, in the real world, actual speeds depend on many factors: how far you are from a cell tower, network congestion, the specific frequency band being used, and even the weather. You’ll typically see speeds ranging from 10 Mbps to 50 Mbps or more, which is plenty fast for most tablet tasks like HD video streaming, large file downloads, and smooth web browsing.
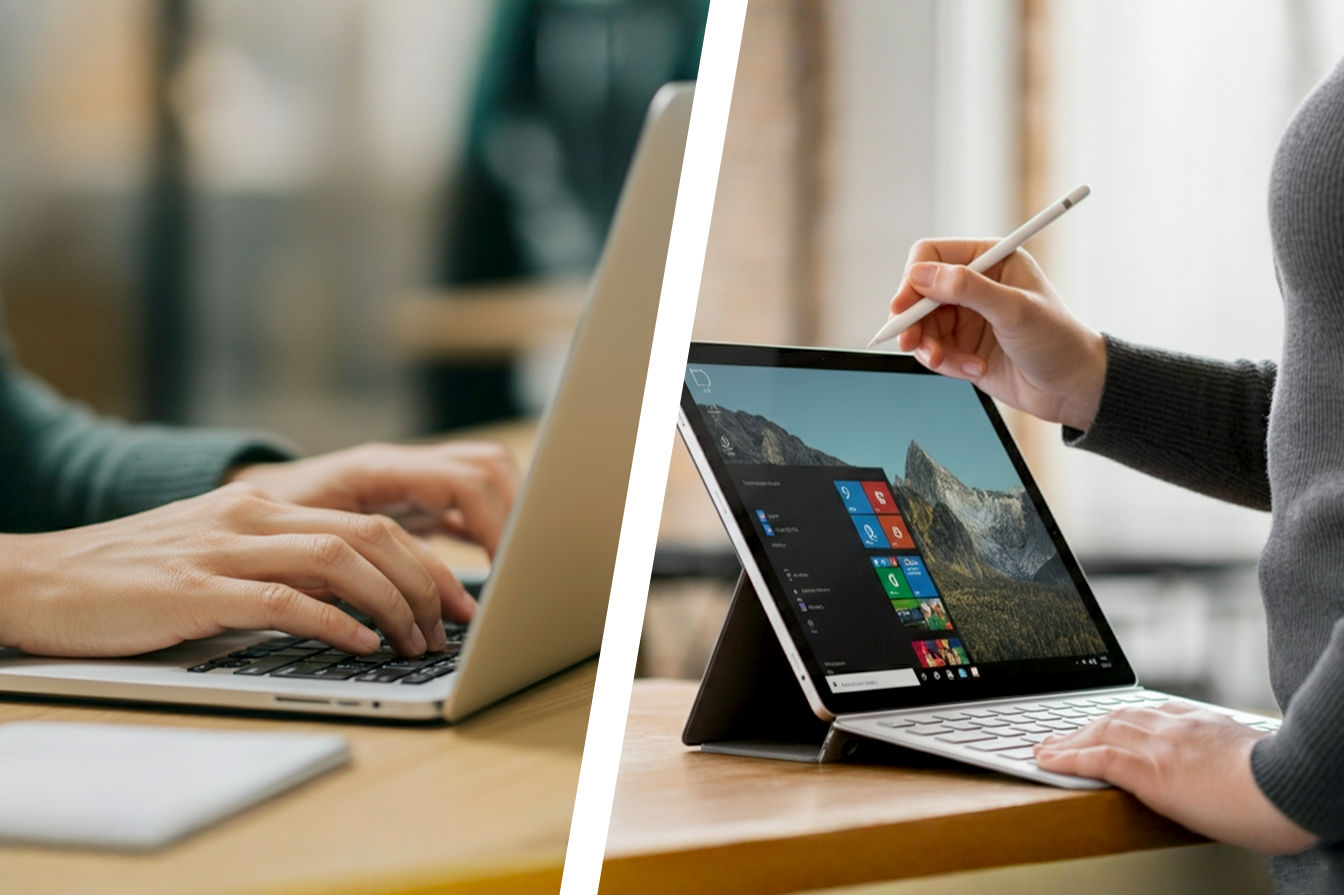
Wi-Fi Only vs. LTE Tablets: Which is Right for You?
This is one of the first big decisions you’ll face. A Wi-Fi only tablet can connect to the internet only when it’s within range of a Wi-Fi network (like your home router, office network, or a public hotspot). An LTE tablet includes the same Wi-Fi capabilities but also has a built-in cellular modem that allows it to connect to the internet using a cellular data plan, just like a smartphone.
Consider your typical usage. If your tablet is primarily for use at home, school, or work where reliable Wi-Fi is always available, a Wi-Fi only model might be perfectly adequate. It’s generally less expensive to buy upfront. However, if you plan to use your tablet frequently while commuting, traveling, or in places without accessible Wi-Fi, an LTE model offers unmatched convenience. You don’t have to hunt for hotspots or rely on your phone’s potentially slower mobile hotspot feature, which can also drain your phone’s battery quickly. The LTE version gives you internet access almost anywhere your cellular carrier has coverage.
Benefits of an LTE Tablet
The most obvious benefit is true mobility. You’re no longer tied to Wi-Fi zones. This means you can be productive or entertained in parks, on public transport, during layovers, or even in places with spotty Wi-Fi coverage. For business users, this means staying connected to email, CRM tools, and cloud storage no matter where a meeting takes you. For students, it means accessing online resources between classes or while studying outdoors.
LTE provides a more reliable connection than many public Wi-Fi networks. Public Wi-Fi can be slow, congested, or even insecure. Using your own cellular data connection is often faster and more private. This is especially important if you handle sensitive information or need a stable connection for video conferencing.
Additionally, LTE can improve the accuracy of location services. While Wi-Fi and GPS help, cellular triangulation can provide a quicker and more accurate initial location fix, which is useful for mapping and location-aware apps.
Potential Downsides of LTE Tablets
While the freedom is great, there are drawbacks. LTE tablets typically have a higher initial purchase price than their Wi-Fi only counterparts. That built-in cellular modem adds to the manufacturing cost.
The biggest ongoing cost is the monthly expense for a data plan. Just like your smartphone, an LTE tablet needs a subscription from a cellular carrier to access the network. These plans vary in cost depending on the data allowance and the carrier, adding another bill to your monthly expenses.
Finally, using the cellular modem can potentially impact battery life more than using Wi-Fi, especially in areas with a weak signal where the tablet has to work harder to maintain a connection. However, modern tablets and LTE technologies are quite efficient, so this is often a minor concern compared to the benefits of connectivity.
Choosing the Right LTE Tablet
Once you’ve decided an LTE tablet is for you, the next step is picking the specific device. This involves considering the usual tablet features, but with a critical focus on its cellular capabilities and compatibility.
Finding Your Perfect LTE Companion
Beyond the LTE feature, you’ll still need to think about the core aspects of the tablet itself. The Operating System (iOS, Android, or Windows) will dictate the apps you can use and the overall user experience. iOS (on iPads) is known for its simplicity and vast app ecosystem. Android offers more customization and a wider range of hardware options from different manufacturers. Windows tablets often blur the line with laptops, running full desktop applications. Your choice here might depend on your existing devices and preferred ecosystem.
Consider the Size and Weight – will you be carrying it everywhere, or mostly using it at a desk? A smaller, lighter tablet is more portable. Storage Capacity is important for apps, media, and offline files; remember that cloud storage is great with LTE, but local storage is essential when you don’t have a signal or want quick access. The Processor and RAM determine how fast and smoothly the tablet runs apps and handles multitasking. If you plan on demanding tasks like video editing or gaming, you’ll need more power. Don’t forget the Camera if you plan on using it for video calls or taking photos. Finally, look at Build Quality and Features like screen resolution, speaker quality, durability, and whether it supports accessories like a stylus or keyboard, which can significantly enhance productivity.
Checking LTE Compatibility: The Crucial Step
This is arguably the most important technical hurdle when buying an LTE tablet, especially if you’re buying it unlocked or from a different carrier than the one you plan to use. Not all LTE tablets work on all cellular networks. This comes down to something called cellular bands.
Understanding Cellular Bands and Frequencies
Think of cellular communication like radio stations. Each station broadcasts on a specific frequency. Cellular carriers are licensed to use specific ranges of these frequencies, called bands, to transmit their signals. In the U.S., major carriers like Verizon, AT&T, and T-Mobile operate across many different bands (e.g., Band 2, Band 4, Band 12, Band 66, Band 71, etc.). Newer technologies like 5G also use different bands, including some higher frequencies (mmWave) and lower frequencies (Sub-6 GHz).
Why does this matter? A tablet’s cellular modem is designed to work on a specific set of these bands. If the tablet doesn’t support the bands that your chosen carrier uses in your area, it simply won’t be able to connect to their LTE network. This is why a tablet designed for use on AT&T’s network might not get a signal on Verizon, even if both are technically “LTE.”
Different countries and regions also use different sets of bands. A tablet bought in Europe might not support the necessary bands to get LTE speeds in the U.S., and vice versa. This is why you’ll often see different model numbers for the “same” tablet in different regions (e.g., an iPad model A2428 might be the global version, while A2429 is specific to North America). These global vs. regional tablet models support different sets of bands. If you travel internationally frequently, look for a tablet model explicitly advertised as supporting a wide range of global LTE bands.
Before buying an LTE tablet, especially an unlocked one, you must check which LTE bands it supports and compare that list to the bands used by the cellular carrier you intend to use. Most tablet manufacturers list the supported bands in the device’s specifications. Carrier websites also list the bands they use. There are also third-party websites and tools online where you can enter a tablet model or IMEI and see which networks it’s compatible with. This step is non-negotiable if you want to ensure your tablet will actually get cellular service.
Carrier Compatibility: Will it Work on Your Network?
Even if the bands seem to match, it’s always best to verify compatibility directly with the carrier. Major carriers often have a list of supported devices on their website. This list includes devices that are certified to work fully on their network, including features like VoLTE (Voice over LTE), which some tablets might use for certain services, although tablets are primarily data-focused.
The most reliable way to check is to use the carrier’s IMEI checker tool. The IMEI (International Mobile Equipment Identity) is a unique 15-digit serial number for your tablet’s cellular modem. You can usually find the IMEI in the tablet’s settings (under About or Status) or printed on the device’s packaging. Go to the carrier’s website, find their compatibility checker (often labeled “Bring Your Own Device” or “Check Compatibility”), and enter the IMEI. The tool will tell you if the tablet is compatible with their network.
Unlocked vs. Carrier-Locked Tablets
When buying an LTE tablet, you’ll usually encounter two main types: unlocked and carrier-locked.
An unlocked tablet is not tied to any specific cellular carrier. You can buy it directly from the manufacturer (like Apple, Samsung, Microsoft) or a major retailer. With an unlocked tablet, you can purchase a SIM card or activate an eSIM profile from any compatible carrier and use their service. The main pro of an unlocked tablet is flexibility. You can switch carriers whenever you want to find a better plan or coverage, and the tablet will generally have a higher resale value. The main con is that unlocked tablets typically have a higher upfront cost because you aren’t getting any subsidy or financing deals tied to a carrier contract. You’ll also need to source your own SIM card or manage the eSIM activation yourself.
A carrier-locked tablet is sold directly by a specific cellular provider (e.g., buying an iPad from Verizon or a Samsung tablet from AT&T). These tablets are configured to work only on that carrier’s network, at least initially. The primary pro of a carrier-locked tablet is that it might have a lower upfront cost, often subsidized by the carrier or offered through attractive installment plans bundled with a data plan. The main con is a significant lack of flexibility. You are tied to that carrier, and switching to another provider can be difficult or impossible until the device is unlocked, which may require meeting specific criteria (like completing a contract term) and potentially paying an unlocking fee.
For the most freedom and ability to shop around for the best data plan deals, an unlocked tablet is generally recommended, provided you can handle the higher initial cost.
SIM Card vs. eSIM: What’s the Difference?
Connecting your LTE tablet to a cellular network requires a Subscriber Identity Module (SIM). Traditionally, this has been a physical SIM card – a small plastic card with a chip that you insert into a slot on the device. These come in different sizes: Standard, Micro, and Nano SIM, with Nano SIM being the most common in modern devices.
An eSIM, or embedded SIM, is a newer technology where the SIM functionality is built directly into the tablet’s hardware. Instead of swapping physical cards, you activate the cellular plan digitally. The carrier sends a digital profile to your tablet, which acts as the SIM.
Many newer LTE tablets support eSIM, and some even offer both a physical SIM card slot and eSIM capability.
The benefits of eSIM include greater convenience (no need to handle tiny cards or find a paperclip to open the tray), easier switching between carriers (you can store multiple eSIM profiles on a device and switch between them in settings), and it allows for slightly smaller device designs as there’s no need for a physical SIM tray.
The drawbacks of eSIM are that it’s not yet universally supported by all carriers or all tablet models. The activation process, which often involves scanning a QR code or using a carrier app, can sometimes be less straightforward than simply inserting a physical card, especially if you encounter technical issues.
Consider which technology the tablet supports and which your preferred carrier uses when making your choice.
Budgeting for the Tablet and Ongoing Costs
When budgeting for an LTE tablet, don’t just look at the sticker price of the device. Remember to factor in the initial device purchase price, which will be higher for LTE models and potentially higher still for unlocked versions. Look out for sales, promotions, or consider certified refurbished models from reputable sources to save money.
Crucially, you must budget for the ongoing cost of the data plan. This will be a recurring monthly or annual expense. Research typical data plan costs for the allowance you think you’ll need.
Also, be aware of potential activation fees or setup costs that carriers might charge when you first connect the tablet to their network. We’ll discuss these more in the section on hidden fees. Finally, consider the cost of necessary accessories like a protective case, screen protector, or a keyboard attachment or stylus if you plan to use them. Calculating the total cost of ownership over the expected lifespan of the tablet (say, 1-2 years) will give you a more realistic picture of the overall expense.
Navigating Data Plans for Your Tablet
Once you have your LTE tablet (or are close to choosing one), you need to figure out how you’ll get cellular data service. This involves selecting a data plan, and the options can sometimes feel overwhelming. The key is to understand the different types of plans and choose one that fits your usage habits without paying for data you don’t need or getting hit with unexpected charges.
Picking the Right Data Plan Without Overpaying
Data plans for tablets aren’t always the same as phone plans. While some carriers let you add a tablet to a shared phone plan, dedicated tablet plans or prepaid options are also common. Understanding the differences is vital for making an economical choice.
Types of Tablet Data Plans
Carriers offer a few main ways to get data onto your LTE tablet:
Data-Only Plans: The Dedicated Option
As the name suggests, data-only plans provide a specific amount of cellular data each month (or year) for devices like tablets, hotspots, or modems. These plans don’t typically include voice minutes or text messaging, as tablets aren’t primarily used for traditional calls or texts.
The main pro of a data-only plan is its simplicity. You get a clear data allowance – say, 10GB, 20GB, or 50GB per month. The pricing is usually structured around these data tiers. They are often competitively priced per gigabyte compared to adding a tablet to a phone plan, especially if you need a significant amount of data just for the tablet. They also come with their own separate bill, which some people prefer for budgeting.
A potential con is that it’s a separate expense from your phone bill. If you already have a large data allowance on your phone plan that you consistently underutilize, adding a tablet to that plan might be cheaper. Data-only plans can also sometimes have slightly lower network priority than smartphone plans during times of congestion.
These plans usually come in tiered data structures (e.g., you pay $30/month for 10GB). Some carriers offer “unlimited” data-only plans, but these almost always have a high-speed data cap (e.g., the first 30GB at full speed, then reduced speeds).
Adding to an Existing Phone Plan: Convenience vs. Cost
Many major carriers allow you to add your tablet to your existing family or individual phone plan. This means the tablet shares the data allowance from your main plan.
The biggest pro here is convenience. You get a single bill covering all your devices. If your phone plan has a large data pool that you consistently underutilize, adding a tablet can be a cost-effective way to use that excess data without paying for a completely separate plan. You might pay a monthly “access fee” (often $10-$20) to add the tablet line, plus the cost of the tablet itself, but you avoid the separate data plan charge.
However, there are cons. Adding a data-hungry tablet can quickly use up your shared data pool, potentially leading to overage charges on tiered plans or triggering speed reductions (throttling) sooner on “unlimited” plans for all devices on the account. Carriers might also deprioritize tablet data on shared plans compared to smartphone data during network congestion.
How it works is usually straightforward: you contact your carrier, provide the tablet’s IMEI, and they add it as another line or device on your account, often with a specific monthly fee for that line.
Prepaid vs. Postpaid: Flexibility vs. Commitment
Just like phone plans, tablet data plans come in prepaid and postpaid options.
With a prepaid plan, you pay for your data service before you use it. You might buy a certain amount of data (e.g., 5GB) that’s valid for a specific period (e.g., 30 days), or subscribe to a monthly plan you pay for upfront. The key characteristic is no contract.
The pros of prepaid include no credit check required, no long-term contract (meaning no Early Termination Fees if you stop service), and greater control over spending as you can only use the data you’ve paid for. It’s easy to switch carriers or pause service if you don’t need it for a while.
The cons of prepaid are that data allowances often expire if not used within the validity period. You typically won’t get device subsidies, so you’ll need to buy the tablet outright. Some prepaid plans may also experience data deprioritization during peak network times compared to postpaid users.
A postpaid plan means you use the data service first and then receive a bill at the end of the billing cycle based on your plan and usage. These plans often involve a contract for a specific term (e.g., 1 or 2 years), especially if you finance the tablet through the carrier.
The pros of postpaid include access to device financing options, potentially more data or features included, and often higher network priority.
The cons of postpaid are that they usually require a credit check. You are typically locked into a contract with potential Early Termination Fees (ETFs) if you leave early. There’s also a risk of overage charges if you exceed your data limit on a tiered plan.
Your choice between prepaid and postpaid depends on your financial situation, how you prefer to manage your expenses, and your need for device financing or contract-free flexibility.
Understanding Data Allowances and Usage
Data plans are measured in Gigabytes (GB). But what does a GB actually mean in terms of tablet usage? It can be hard to visualize. Roughly speaking:
- 1 GB is enough for about 10-12 hours of standard web browsing.
- 1 GB can support about 1-2 hours of standard definition (SD) video streaming. High definition (HD) or 4K streaming uses significantly more data (2-5 GB per hour or more).
- Downloading a large app or game can use several GBs.
- Checking email and social media without heavy media loading uses relatively little data.
Most plans come with a tiered data structure, giving you a fixed number of GBs per billing cycle. If you exceed that limit on a tiered plan, you’ll likely face expensive overage charges per additional GB used.
“Unlimited” plans are popular, but it’s crucial to understand the reality. Most “unlimited” plans for tablets (and phones) aren’t truly unlimited high-speed data. They come with a high-speed data cap (e.g., 20GB, 30GB, 50GB). Once you hit that cap within a billing cycle, your data speed will be significantly reduced, a process called throttling, for the remainder of the cycle. While you can still use data, speeds may be too slow for streaming video or other data-intensive tasks. Read the plan details carefully to find this cap.
Some plans also include a separate allowance for hotspot data, which is data used when your tablet acts as a Wi-Fi hotspot for other devices. If you plan to use your tablet to connect a laptop or other device, check if hotspot data is included and what its limit is.
It’s essential to monitor your data usage regularly to avoid surprises. Most carriers have a mobile app or website where you can track your data consumption in near real-time. Your tablet’s settings also usually show data usage per app, which can help you identify what’s using the most data.
Comparing Carriers and Their Offerings
Choosing a data plan also means choosing a carrier. The major national carriers in the U.S. (Verizon, AT&T, and T-Mobile) own and operate their own large cellular networks. They generally offer the widest coverage and fastest speeds, but often at a higher price point. They offer a range of data-only plans and options to add tablets to existing phone plans.
Mobile Virtual Network Operators (MVNOs) are smaller providers (like Mint Mobile, Google Fi, Visible, etc.) that don’t own their own cellular towers. Instead, they lease capacity from the major networks. MVNOs often offer lower prices and more flexible plans (especially prepaid), but they may have lower data priority than the major carrier’s direct customers during network congestion. Coverage will be the same as the underlying network they use, but check which network that is.
When comparing carriers, look beyond just the price and data allowance:
- Coverage: Check their coverage maps for the areas where you’ll use your tablet most often. Remember that advertised maps are estimates; ask friends/family in those areas about their real-world experience.
- Speed: Research typical speeds in your area.
- Plan Options: Do they offer the type of plan you want (data-only, shared, prepaid, postpaid)?
- Features: Do they include features like international roaming options, hotspot data, or streaming benefits?
- Customer Service: How easy is it to get help if you have an issue?
Reading the Fine Print: Contracts and Terms
Before committing to a data plan, especially a postpaid one, read the contract and terms of service carefully. Pay attention to:
- The length of the contract (e.g., 12 or 24 months).
- The Early Termination Fee (ETF) policy – how much you’ll pay if you cancel service before the contract expires.
- Any clauses about automatic renewal of your service.
- The carrier’s right to change terms and conditions and how they will notify you.
Understanding these details upfront can prevent costly surprises down the road.
Activating Your LTE Tablet
You’ve chosen your tablet and picked a data plan. Now it’s time to get connected! The activation process varies slightly depending on whether your tablet uses a physical SIM card or an eSIM, and which carrier you’ve chosen.
Getting Your Tablet Connected to the Network
The goal of activation is to link your specific tablet (identified by its IMEI) to your account and the data plan you’ve selected on the carrier’s network.
The Activation Process: Step-by-Step
For SIM Card Tablets
If your tablet uses a physical SIM card, the process typically involves these steps:
- Locating the SIM card slot: This is usually on the side of the tablet and might be a small tray with a tiny hole next to it. You’ll often need a SIM ejection tool (a small metal pin that comes with the tablet or can be a straightened paperclip) to push into the hole and release the tray.
- Identifying SIM card size: Ensure the SIM card provided by your carrier is the correct size for your tablet (Standard, Micro, or Nano). Most modern tablets use Nano SIMs. If your card is larger, it might have perforated edges allowing you to pop out the correct smaller size.
- Inserting the SIM card correctly: Place the SIM card onto the tray, making sure the cut corner aligns and the metal contacts are facing the correct way (usually down, towards the back of the tablet). Carefully push the tray back into the slot until it sits flush with the tablet’s side.
- Turning on the tablet: Power on your tablet.
- Following initial setup prompts: During the initial setup (or if setting up cellular later), the tablet’s operating system will guide you. It might ask about cellular setup.
- Connecting to Wi-Fi initially: You might need to connect to Wi-Fi for the tablet to download necessary carrier settings or complete the initial setup process.
- Tablet detecting the network: The tablet should detect the newly inserted SIM card and attempt to connect to the carrier’s network. You should see signal bars appear, possibly with an LTE or 4G indicator.
- Potential carrier-specific activation steps: Some carriers require an extra step. This might involve calling a specific activation number, visiting a carrier’s website to enter the SIM card number and IMEI, or using a carrier’s dedicated activation app. Follow the instructions provided by your carrier when you received the SIM card or signed up for the plan.
For eSIM Tablets
If your tablet supports and will use an eSIM, the process is digital:
- Ensuring the tablet supports eSIM: Confirm that your specific tablet model has eSIM capability.
- Obtaining the eSIM activation information from the carrier: Your carrier will provide you with the necessary information to download the eSIM profile. This is often a QR code you scan with the tablet’s camera, an activation code you enter manually, or instructions to use the carrier’s mobile app to activate.
- Navigating tablet settings to add a cellular plan: On iOS (iPad), go to Settings > Cellular Data > Add a New Plan. On Android, it’s typically Settings > Network & internet > Mobile network > Advanced > Carrier > Add carrier or Download a SIM. The exact path might vary slightly depending on the Android version and tablet manufacturer. On Windows, it’s usually in Network & Internet settings.
- Scanning the QR code or entering the activation code: Use the tablet’s camera to scan the QR code provided by the carrier, or manually enter the activation code when prompted.
- Tablet downloading and installing the eSIM profile: The tablet will connect to the internet (usually via Wi-Fi for this step) to download the digital SIM profile from the carrier.
- Following on-screen prompts: The tablet will guide you through confirming the plan details and completing the activation.
Activating a Tablet on an Existing Phone Plan
If you’re adding the tablet to an existing shared data plan, the activation is often handled differently:
- This is frequently done through the carrier’s website, their mobile app, or by calling customer service.
- You will need to provide the tablet’s IMEI number to the carrier.
- The carrier then links the tablet to your existing account and the shared data plan. They may send you a SIM card or provide instructions for eSIM activation if the tablet wasn’t purchased directly from them.
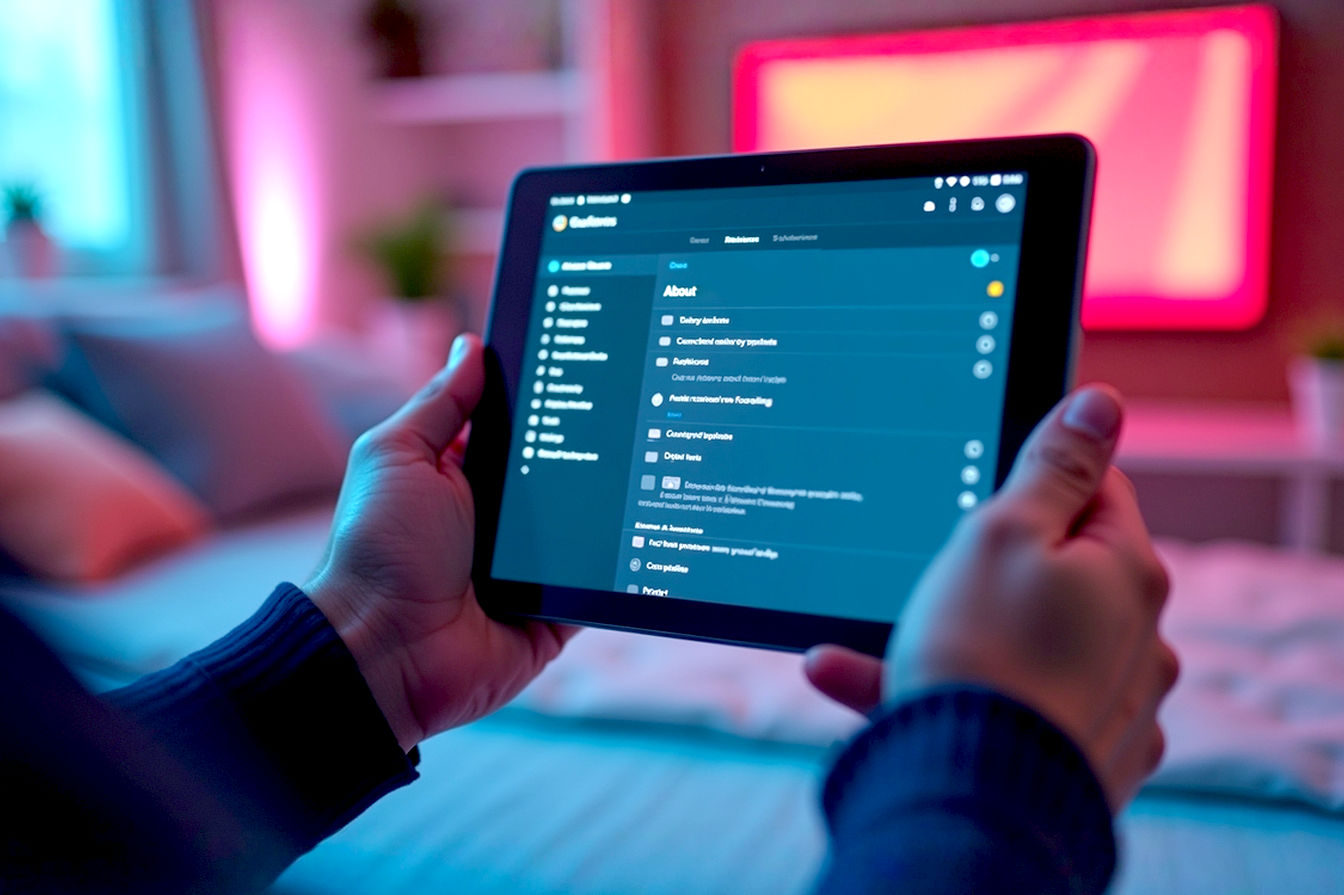
Setting Up APN Settings (If Needed)
In most cases, when you insert a carrier’s SIM card or activate their eSIM, your tablet will automatically configure the correct APN settings. APN stands for Access Point Name. It’s essentially the gateway information your tablet needs to connect from the cellular network to the public internet. It tells the tablet where to send cellular data.
However, sometimes you might need to manually set up APN settings. This is more common with unlocked tablets, especially when using an MVNO, or if the automatic setup fails.
Symptoms of incorrect APN settings include:
- The tablet shows a cellular signal (LTE/4G indicator is present) but you cannot access the internet, send/receive multimedia messages (MMS), or use certain data services when Wi-Fi is off.
- Web pages don’t load, apps can’t connect to the internet over cellular.
If you suspect an APN issue, you’ll need to find the correct APN settings for your specific carrier and plan. You can usually find these on your carrier’s support website or by doing an online search for “[Carrier Name] APN settings”.
The steps to manually enter APN settings vary slightly by operating system:
- iOS (iPad): Settings > Cellular Data > Cellular Data Options > Cellular Data Network. You’ll see fields for APN, Username, and Password. Enter the correct information provided by your carrier.
- Android: Settings > Network & internet (or Connections) > Mobile network > Advanced > Access Point Names (APNs). You’ll see a list of APNs; you might need to add a new one using a “+” or menu icon and fill in the details. The exact path can vary slightly by device and Android version.
- Windows: Settings > Network & internet > Cellular > Advanced options > Add an APN.
After entering the settings, save them and often you need to select the newly created APN to make it active. Restarting the tablet can sometimes help apply the changes.
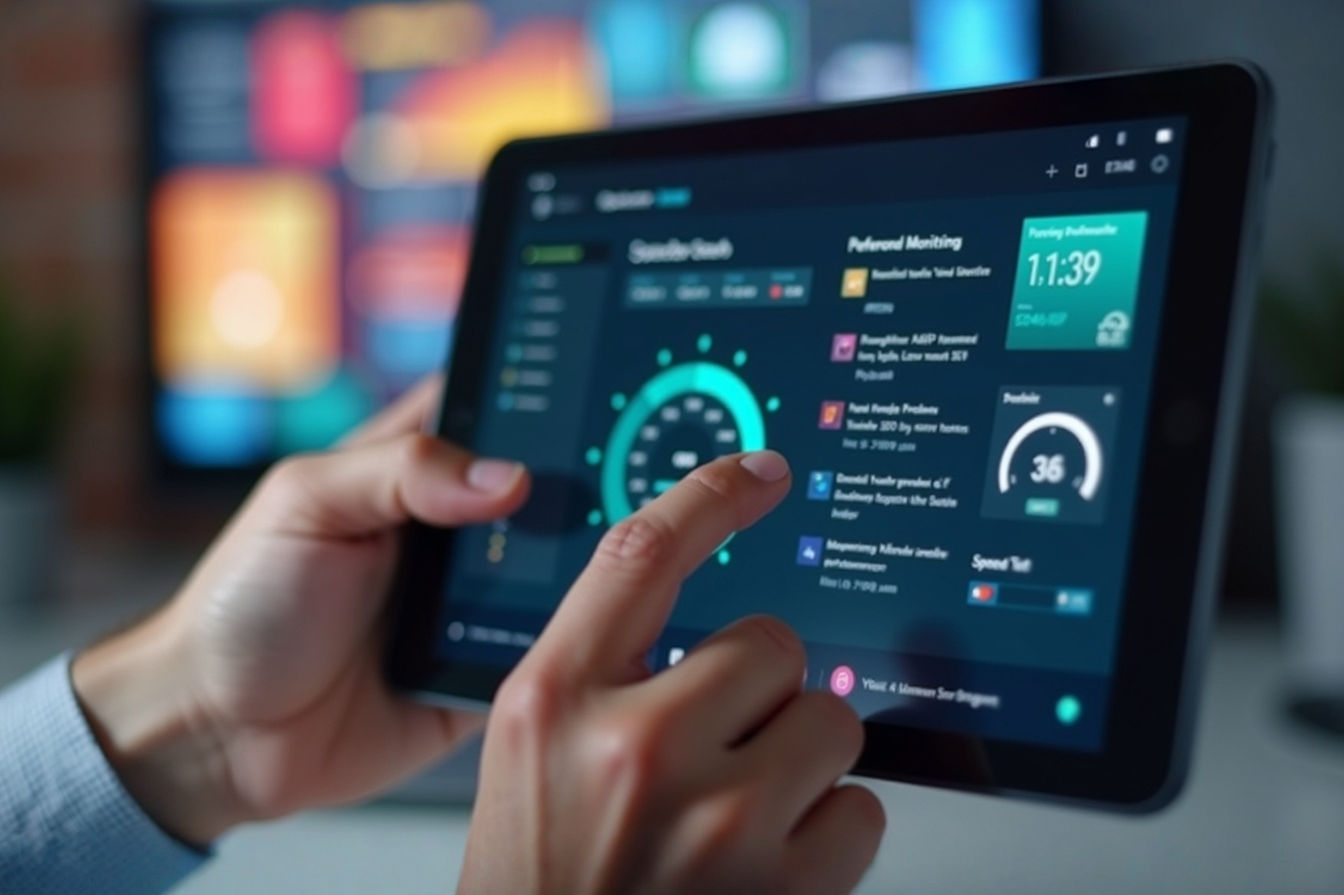
Verifying Connectivity and Testing Data Speed
Once you believe the tablet is activated, it’s crucial to verify that it’s connected and getting good speeds.
- Check for signal bars: Look at the status bar at the top of the screen. You should see signal strength bars and an indicator like “LTE,” “4G,” or “5G” next to them.
- Turn off Wi-Fi: Go into settings and temporarily disable Wi-Fi. This forces the tablet to use the cellular connection.
- Open a web page or app: Try loading a website in a browser or opening an app that requires internet access (like a social media app or email). If they load quickly, your connection is likely working.
- Use a speed test app: For a more definitive check, download a free speed test app (like Ookla Speedtest) from the app store. Run the test to see your actual download and upload speeds. This helps confirm you’re getting the expected performance from your plan.
If you encounter issues, try basic troubleshooting: restart your tablet, double-check that the SIM card is inserted correctly (if applicable), verify the eSIM profile is active, confirm your data plan is active with the carrier, and check the APN settings again. If problems persist, contact your carrier’s customer support.
Avoiding Hidden Fees and Unexpected Costs
You’ve done the hard work of choosing and activating your LTE tablet and data plan. Now, let’s talk about protecting your wallet from those sneaky charges that can add up and make your connectivity more expensive than you planned. Hidden fees aren’t always intentionally “hidden” in a deceptive way, but they can be easily overlooked in contracts or terms of service if you don’t know what to look for.
Protecting Your Wallet: Watch Out for These Charges
Carriers make money not just from your base monthly plan cost, but also through various fees. Being aware of the most common ones is your first line of defense.
Common Hidden Fees to Look For
Activation Fees
This is a one-time charge that many carriers impose when you first start a new line of service or activate a new device on their network. It’s meant to cover the cost of setting up your account in their system. Activation fees can range anywhere from $0 (during promotions) to $50 or even more per line. While they are a legitimate charge for the service provided, they can feel like a hidden cost if you aren’t aware of them upfront. It’s important to know if this fee applies to tablet lines, as it doesn’t always.
Upgrade/Device Fees
If you purchase your tablet through a carrier on an installment plan or as part of a contract, you might encounter upgrade fees or device connection fees when you get a new device or sometimes even just add one to your account. These are separate from the activation fee and relate specifically to the device itself and setting it up on the plan.
Regulatory and Administrative Fees
These are some of the most confusing and frustrating fees for consumers because they aren’t government taxes but are imposed by the carrier. Carriers often bundle various internal operating costs or fees related to complying with regulations and label them vaguely. Examples include Regulatory Recovery Fees, Administrative Fees, or Carrier Universal Service Charges. These fees are designed to recoup costs for the carrier, but they add to your bill and aren’t always clearly explained. They can vary significantly between carriers and even between different plans from the same carrier. They are not the same as the legitimate government-mandated Federal Universal Service Fund (FUSF) fee, although they might sound similar.
Early Termination Fees (ETFs)
If you sign a service contract with a carrier for a specific term (e.g., 1 or 2 years), you will likely be subject to an Early Termination Fee (ETF) if you cancel your service before the contract expires. ETFs are designed to recoup costs the carrier may have incurred, such as subsidizing the cost of your tablet or providing promotional discounts based on your commitment. The amount of the ETF often decreases the longer you stay in the contract, but it can still be several hundred dollars if you cancel early in the term. This is a major reason why understanding the contract length is crucial.
Overage Charges
This is a classic source of bill shock. If you are on a tiered data plan with a fixed data allowance (e.g., 10GB/month) and you exceed that limit, your carrier will charge you for the additional data you use. Overage charges are typically billed per GB or per MB and can be very expensive – sometimes $10 or $15 for just one extra GB. Using a lot of data over your limit can quickly add tens or even hundreds of dollars to your bill. This is less of a risk on plans with “unlimited” high-speed data before throttling, but you still need to be mindful of hitting that throttling threshold.
Roaming Charges
Using your tablet’s cellular data connection when you are outside your carrier’s primary network coverage area is called roaming. This can happen domestically if you’re in an area where your carrier relies on a partner network (domestic roaming), or more commonly, when you are traveling in a different country (international roaming). Roaming charges, especially international ones, can be incredibly expensive. Data rates while roaming internationally without a specific travel plan can be several dollars per MB, meaning checking email or browsing for a few minutes could cost you hundreds of dollars.
Strategies to Minimize or Avoid Fees
Being aware of potential fees is the first step. Taking proactive measures is how you avoid paying them.
Read the Contract Carefully
This cannot be stressed enough. Before you sign up for any postpaid plan or device financing agreement, read the entire contract. Don’t just skim it. Pay close attention to sections detailing fees, billing practices, data usage policies (including overages and throttling), and the terms regarding ending your service. If you don’t understand something, ask the carrier representative to explain it clearly before you sign.
Ask Specific Questions Before Signing Up
Don’t hesitate to ask direct questions about potential fees. Get a clear breakdown of the total expected monthly cost, including all taxes and fees, not just the advertised plan price. Specifically ask:
- “Is there an activation fee for this tablet line?”
- “Are there any other one-time setup fees?”
- “What are the regulatory and administrative fees on this plan, and how much are they per month?”
- “What happens if I go over my data limit? What are the overage charges?” (If on a tiered plan)
- “What is the high-speed data cap on this ‘unlimited’ plan before speeds are reduced?”
- “What is the Early Termination Fee if I cancel service after [X] months?”
- “What are the roaming rates for [specific domestic area or country you might visit]?”
Get these answers in writing if possible, or make detailed notes.
Monitor Data Usage Regularly
This is your best defense against overage charges or unexpected throttling. Use your carrier’s app or the data usage monitor built into your tablet’s settings to track how much data you’re using throughout your billing cycle. Make it a habit to check this a few times a week.
Set Data Usage Alerts
Most carriers allow you to set up alerts via text message or email when your data usage reaches a certain threshold (e.g., 50%, 75%, 90% of your allowance). Configure these alerts as soon as you activate your plan. This gives you a warning before you hit your limit, allowing you to reduce data usage or potentially buy more data if needed.
Consider Prepaid or No-Contract Options
If you want to avoid the risk of Early Termination Fees altogether, choose a prepaid plan or a postpaid plan that does not require a long-term contract. While the monthly cost might sometimes be slightly higher for comparable data, the peace of mind and flexibility can be well worth it.
Understand Roaming Policies Before Traveling
If you plan to use your tablet outside your carrier’s main network area, especially internationally, check the roaming rates and policies beforehand. Don’t just assume your plan includes free international roaming; most standard plans do not. Your carrier might offer international travel passes with a set amount of data for a fixed price, which is usually much cheaper than paying per MB for standard roaming. Alternatively, consider buying a local SIM card or activating a local eSIM profile in your destination country, or relying solely on Wi-Fi while traveling.
Negotiate Fees (Sometimes Possible)
While not always guaranteed, some fees, like activation fees, might be negotiable, especially if you are a new customer, adding multiple lines, or signing up during a promotional period. It never hurts to politely ask the carrier representative if they can waive or reduce certain fees.
Purchase Unlocked Devices
As mentioned earlier, buying an unlocked tablet gives you the freedom to switch carriers easily. This means you aren’t locked into a contract with potential ETFs and can move to a different provider if you find their fees excessive or their plan no longer meets your needs.
Understanding Taxes and Government Fees
It’s important to distinguish between carrier-imposed fees and legitimate taxes and government fees. These charges are mandated by federal, state, and local governments and are typically unavoidable. They can include sales tax on the purchase of the device, 911 service fees, and various state and local taxes on your monthly service. These should be clearly itemized on your bill and are separate from the administrative or regulatory fees added by the carrier. While you can’t avoid these, they should be transparent and consistent with local tax laws.
Conclusion
Choosing and activating an LTE Tablet PC can unlock a new level of freedom and productivity, allowing you to stay connected almost anywhere you go. By understanding what LTE is, carefully selecting a tablet that’s compatible with your needs and your chosen network, and navigating the various data plan options available, you’re well on your way to enjoying seamless mobile connectivity.
The final, crucial step is protecting yourself from unexpected costs. By being aware of common hidden fees like activation fees, regulatory charges, Early Termination Fees, overages, and roaming charges, and by taking proactive steps like reading your contract, asking questions, monitoring your usage, and considering flexible plan options, you can ensure your LTE tablet experience remains both powerful and affordable. With a little research and vigilance, you can confidently choose, activate, and enjoy your LTE tablet without any hidden fees spoiling the connection.